
A worm tower is precisely what it sounds like. It’s a PVC tube, typically around four inches in diameter that gets stuck directly in your garden with the other part of the tube sticking out. The tower acts as a home for your composting worms where you can concentrate your food scraps and the worms “know where to go.”
The worm tower is a cheaper and less messy way to get into vermicomposting.
Over time, as your garden becomes filled with more and more worms, the tower can be removed, and the scraps can be added directly to the soil instead of the tower. The worm tower is essentially a starter that your worms to thrive in a rich environment.
How Does a Worm Tower Work?

The concept of a worm tower is surprisingly simple. If you haven’t read the guide to vermicomposting, or worm castings, it’s highly recommended to check those out. The tower acts as a feeding source where you can concentrate your efforts on the worms. See the clip below for how a worm tower works.
As food scraps and other good composting material is added to the tower, your worms are attracted to the food source. They’ll stay and eat the food source until they’re full and then leave to go to other nearby parts of the garden. When they leave, they’ll be digesting all of the material you put in the tower and scattering it around different parts of the garden.
Over time this creates healthy burrows, aerates the soil, and leaves behind castings. The worms reproduce in different areas of the earth, and eventually, your garden becomes full enough to where you can remove the tower (or make more), and add the scraps directly to the soil.
What are the Benefits of a Worm Tower?
The most prominent benefit of the worm tower is it saves you money in the long run. Many beginners don’t know a lot about worm health or may not have the time to spend caring for the worms. Vermicompost bins and setups are expensive and can get messy. A worm tower is a cleaner, quicker alternative.
While you can make a DIY worm compost bin, this method is often preferred since it is easier to handle and costs a lot less money.
After the worms are thriving and have moved into other parts of the garden, the tower can be removed and reused in another area. After the tower has been removed, adding food scraps becomes much more relaxed, and the gardener doesn’t have to worry as much about feeding the worms.
Did we also mention it’s cheap to make? All you need is some PVC pipe, an end cap, a few basic power tools, and a Saturday afternoon. The worm tower is maintenance-free, apart from adding kitchen scraps from time to time and ensuring the tower hasn’t dried out.
How to Make a DIY Worm Tower
First, let’s start with the materials for making a single worm tower. You’ll need:
Materials
-
- 2’ of 4” diameter PVC pipe
- 1x 4” PVC coupling or repair coupling – this should fit over the 2’ section
- Window screen
Tools
-
- A saw, or something to cut the PVC
- Spade, or other drill bits. Aim for ½” or larger.
- Scissors
- Sandpaper
- Clamp
- Posthole digger or a shovel
- Ruler or straight edge
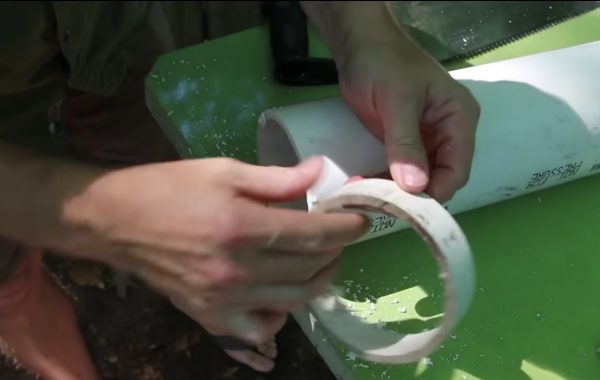
The second thing you’ll want to do is cut about a 1”-1.5” section off the end of your 2’ PVC pipe section. Set this aside for now.
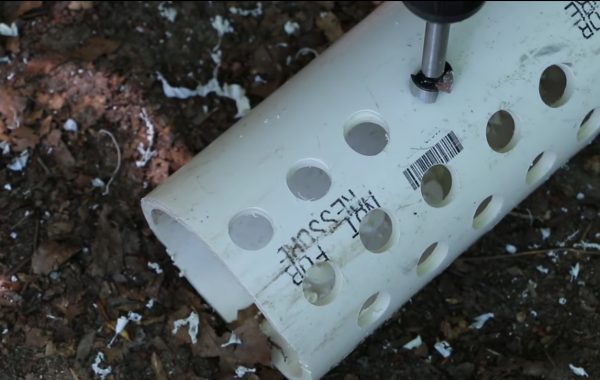
Next, make a mark about a foot up from the bottom of the 2’ section. Around the circumference of the pipe, make about 6-8 evenly spaced marks, then using a straight edge, draw straight down to the bottom from those marks. Each of those marks will then receive 5-6 evenly spaced dots. Where the lines intersect with the dots are where you are going to drill your holes.
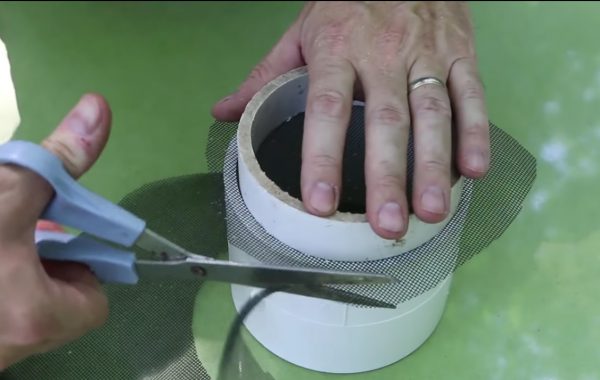
After drilling all of the necessary holes, take your piece of window screen and cut it into a circle. Cut it about an inch or so beyond the size of the PVC pipe. Grab the small 1” section cut off earlier, set the window screen in it, and lightly tap it into the larger coupling.
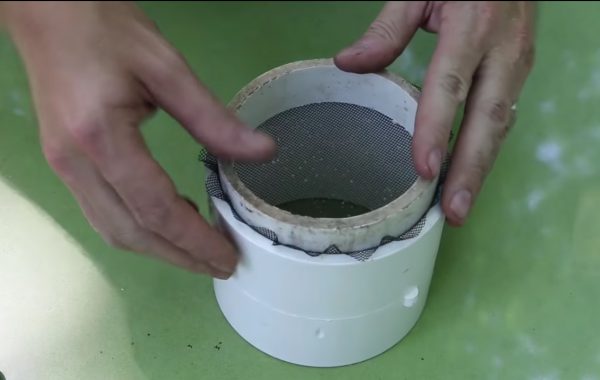
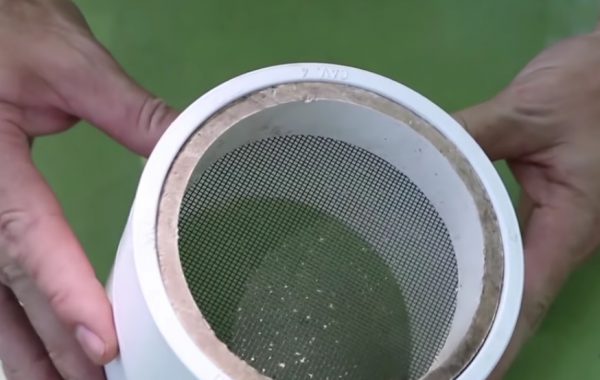
Attach the coupling onto the opposite end of the PVC pipe where cut the holes. The side with the holes will be put into the ground.

Use your post-hole digger, or shovel, and dig a hole about a foot or so into the ground. Dig deep enough to cover the holes in the tower. Keep the hole compact, since you want the tower standing straight up.

Place the worm tower in the hole and add dirt around the tower to ensure it’s stable. Take the cap off the top of the composter and start adding materials.
You’ll want to start with brown material, like fallen leaves or shredded newspaper. Then add some food scraps like banana peels, apple cores, eggshells, coffee grounds, and other natural kitchen scraps. Manure can also be added to the bottom of the mix if desired.

Add your worms and then add a layer of additional brown material. Add a liter of water or so to the mix and then place the cap back on the tower. That’s it!
The 5-Gallon Bucket Worm Tower
Alternatively, you can also use a 5-gallon bucket instead of the PVC pipe. The process is the same, but with fewer steps. Drill plenty of holes in the bottom half of the gallon bucket and drop the bucket into the soil.
Drill a couple of additional holes in the lid of the bucket, so rainwater can reach the soil. Next, add a layer of the brown material and scraps mentioned earlier, along with your worms.
The 5-gallon bucket method is easier for some people because the wide mouth of the bucket allows for adding more scraps in a single go. It’s also helpful for people who might have trouble with raccoons or other critters that try and open up the PVC pipe to reach the food scraps inside. The lid to the bucket requires a little bit more strength to get off.
What Kind of Worms to Use in a Worm Tower?

The worms of choice for gardeners is the Eisenia foetida, better known as the red wiggler. These little guys will do just about anything you put in front of them and are considered the best composting worm out there.
Lumbricus rubellus, also known as red worms, are often used in addition to red wigglers. In fact, it’s typically recommended to use a few different worm species. Different types of worms like to burrow and feed at different depths, so the diversity gives your garden all the benefits each one of them offers.

