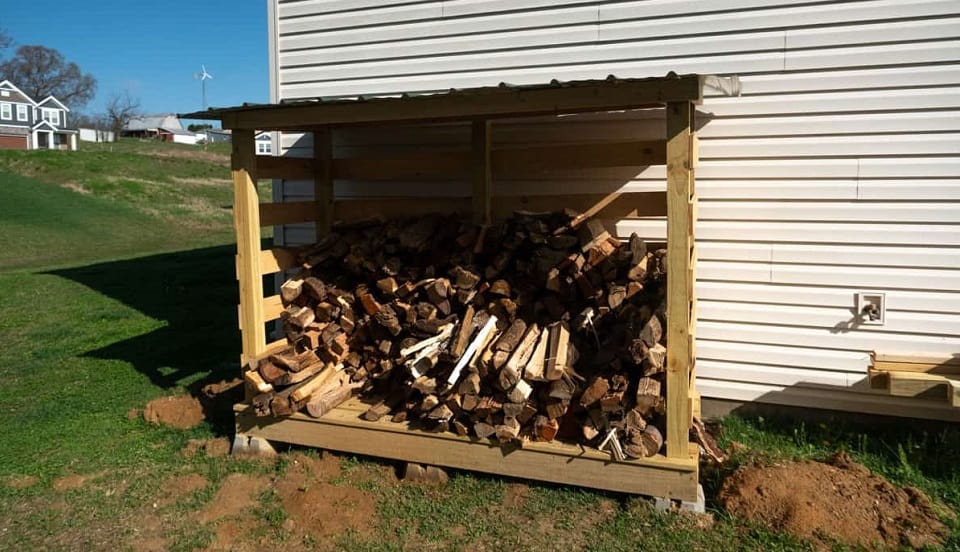
The wood storage shed we’ll be building today measures 8’ long by 3’ wide by 6’ high and will hold about a cord of split wood. The goal of this firewood storage shed is to be simple and safe. This is designed to keep the top as light as possible and the bottom half heavier to prevent it from being too top-heavy.
The finished project with roughly a little over a face cord of wood in it.
Cut and Supply List
The materials listed below are what I used to build this firewood storage shed. I have included notes where I would recommend picking up extra materials or using more. Those points are further explained in the video and article. There are no specialty tools used in this other than the 90-degree bit adapter.
This job can be accomplished with a drill, a circular saw, and a jig saw. Depending on the power of your drill, you may need an impact driver for the lag screws.
Needed Materials
- (4) – 4x4x8 Pressure Treated
- (6) – 2x6x8 Pressure Treated
- (6) – 5/4x6x8 Pressure Treated
- (4) – 2x4x8
- (15) – 6′ Cedar Fence Pickets
- (2) – 3’x8′ Galvanized Steel Roof Panel
- (6) – Concrete Deck Blocks
- (2) – 50lb All-Purpose Gravel, 4-6 bags recommended.
- (18) – 1/4″x4″ Exterior Lag Screws
- (1) – 50pc pack of 1″ Woodtite Fasteners
Cut List
- (4) – 4x4x6
- (8) – 2x6x33″
- (2) – 2x4x83″
- (4) – 2x4x36″
- (10) – Cedar Pickets, 33.25″
- (10) – Cedar Pickets, 46.5″
- (4) – 3’x4′ Steel Roof Panels
Planning and Preparation
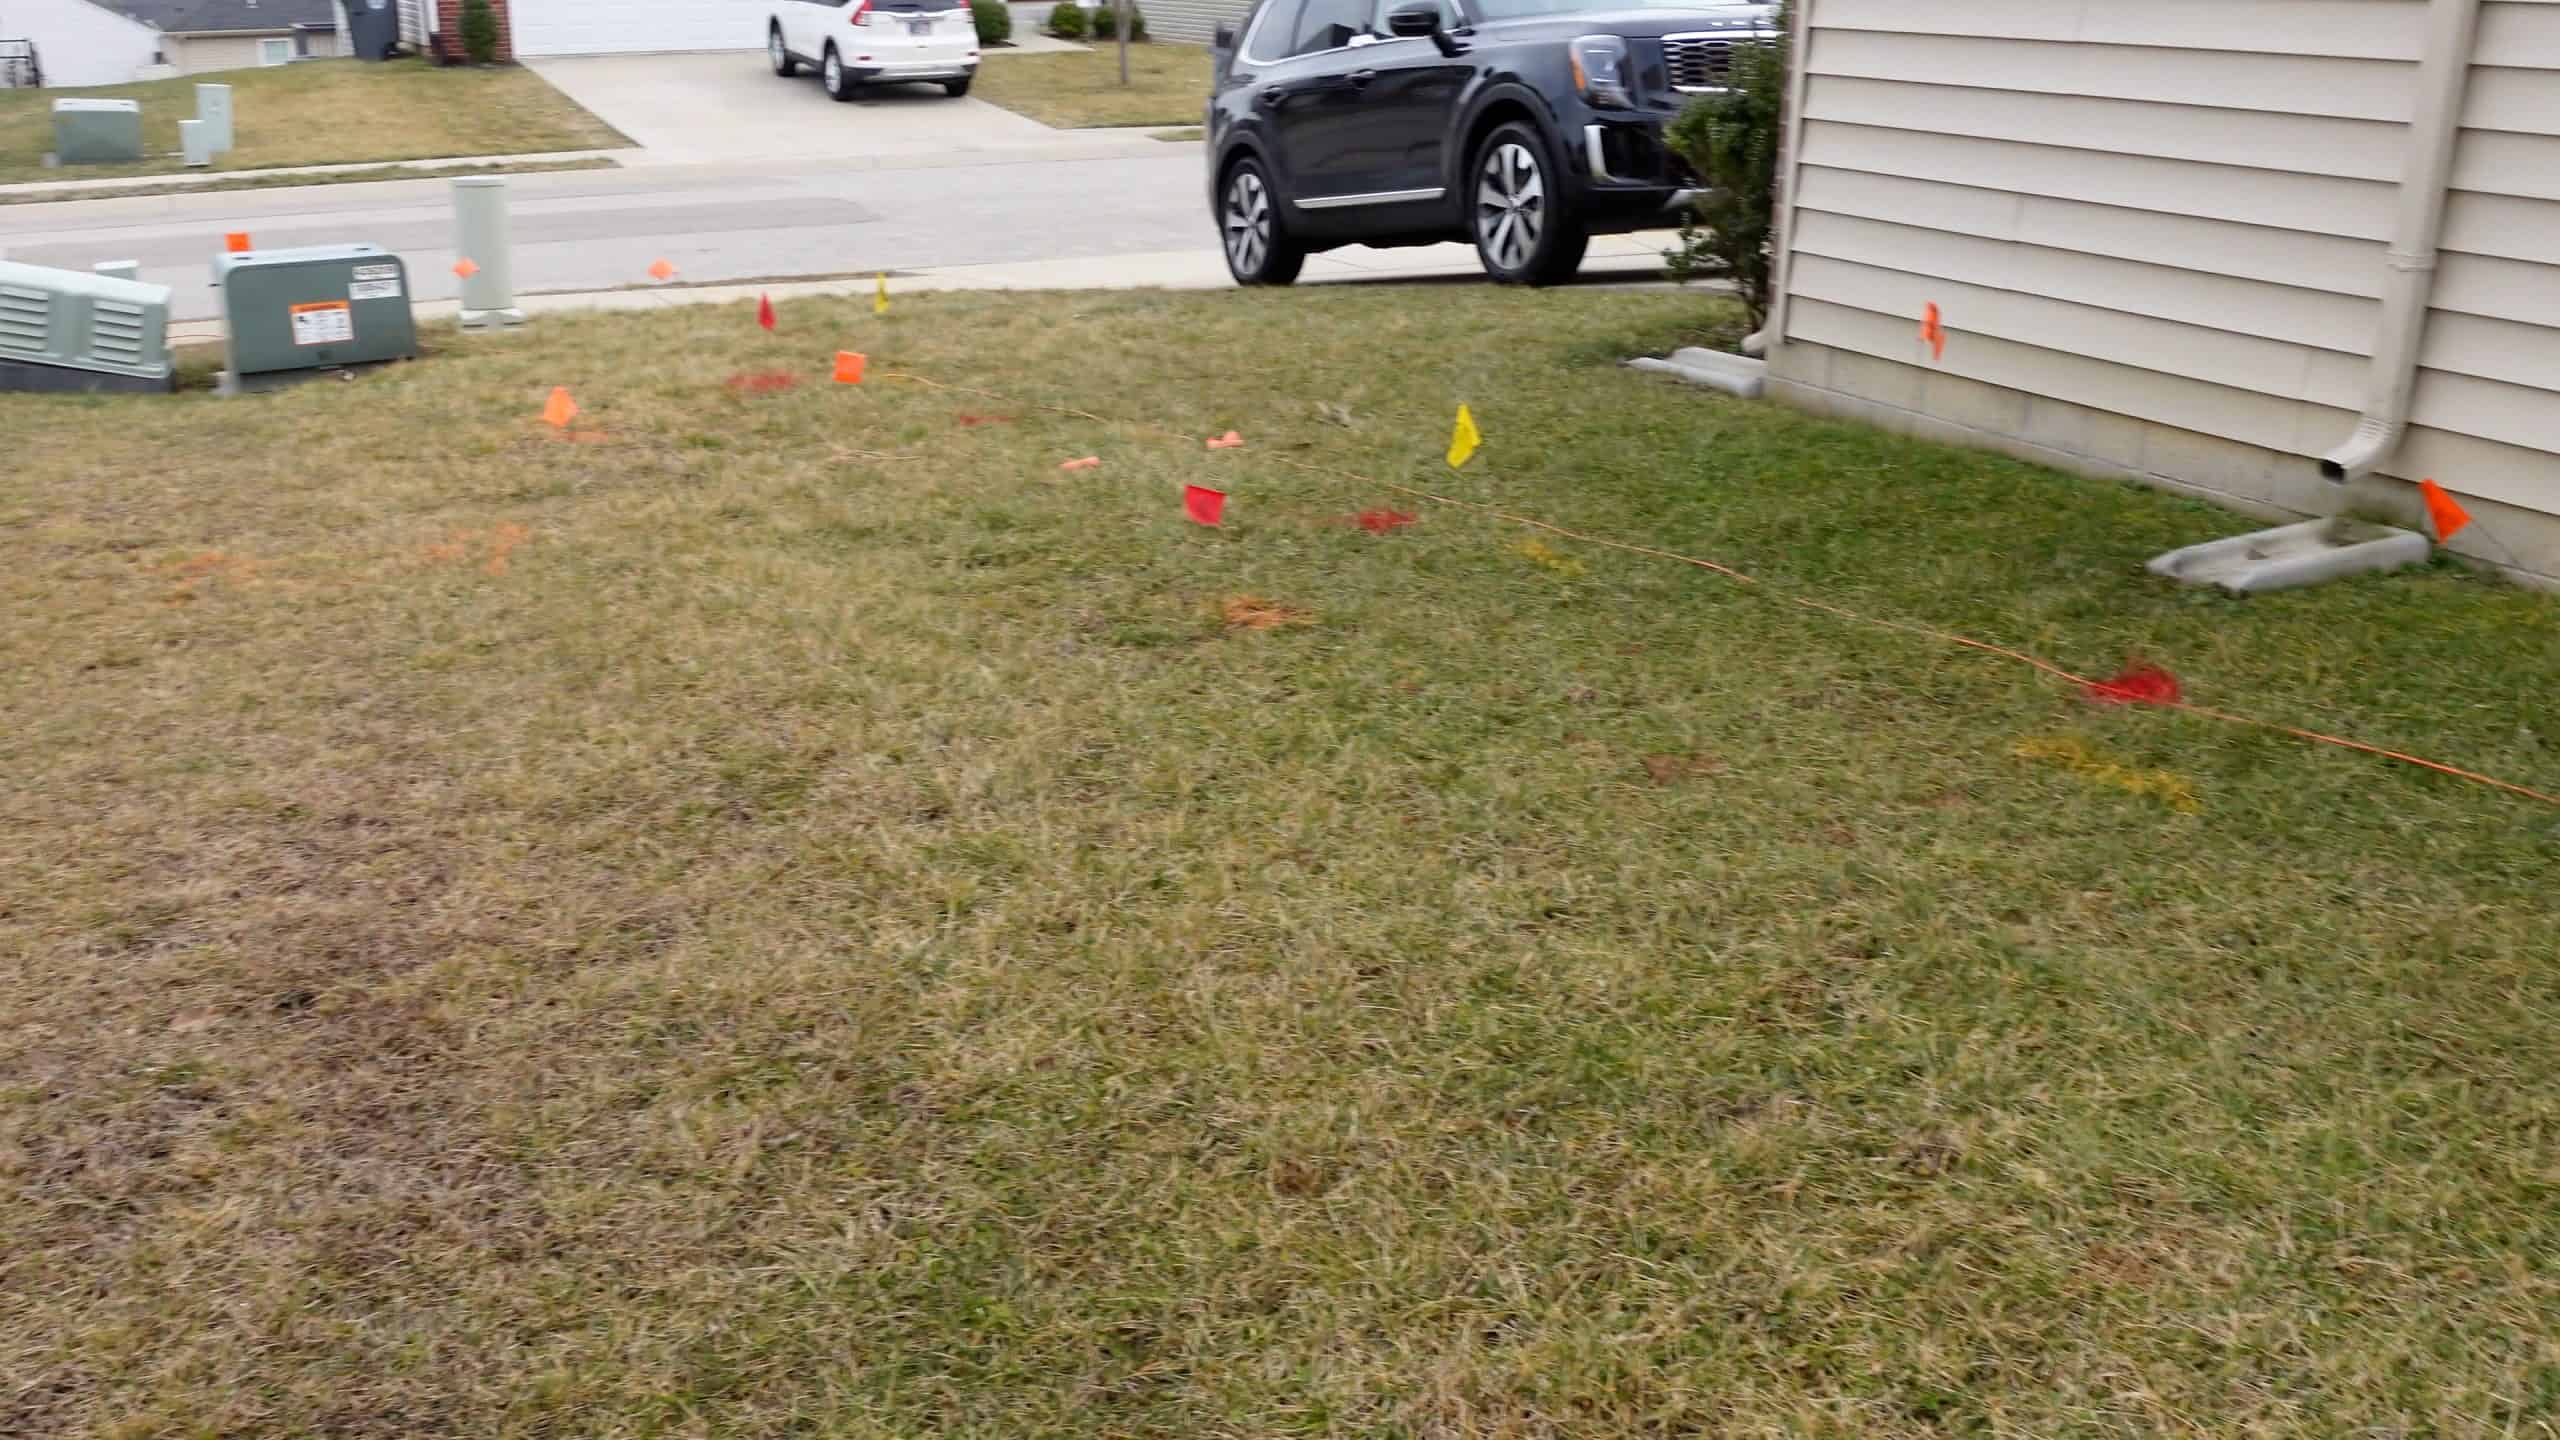
A few days before you start the project, you’ll want to call 811 (if you live in the US) to have them come out and mark where there are buried utility cables and lines. There’s only a little bit of digging, but you don’t want to hit anything you shouldn’t. This is a free service and waiting a few days is better than racking up thousands of dollars in costs or getting accidentally electrocuted.
CAUTION
Buried lines are easier to hit than you think. An electrical or gas line can be fatal and the best-case scenario after hitting a line is you’ll incur a significant fee, typically starting at $500 and above. On this side of my house, there really isn’t anything here besides one fiber optic cable for the internet. The majority of the buried lines are in my neighbor’s yard.
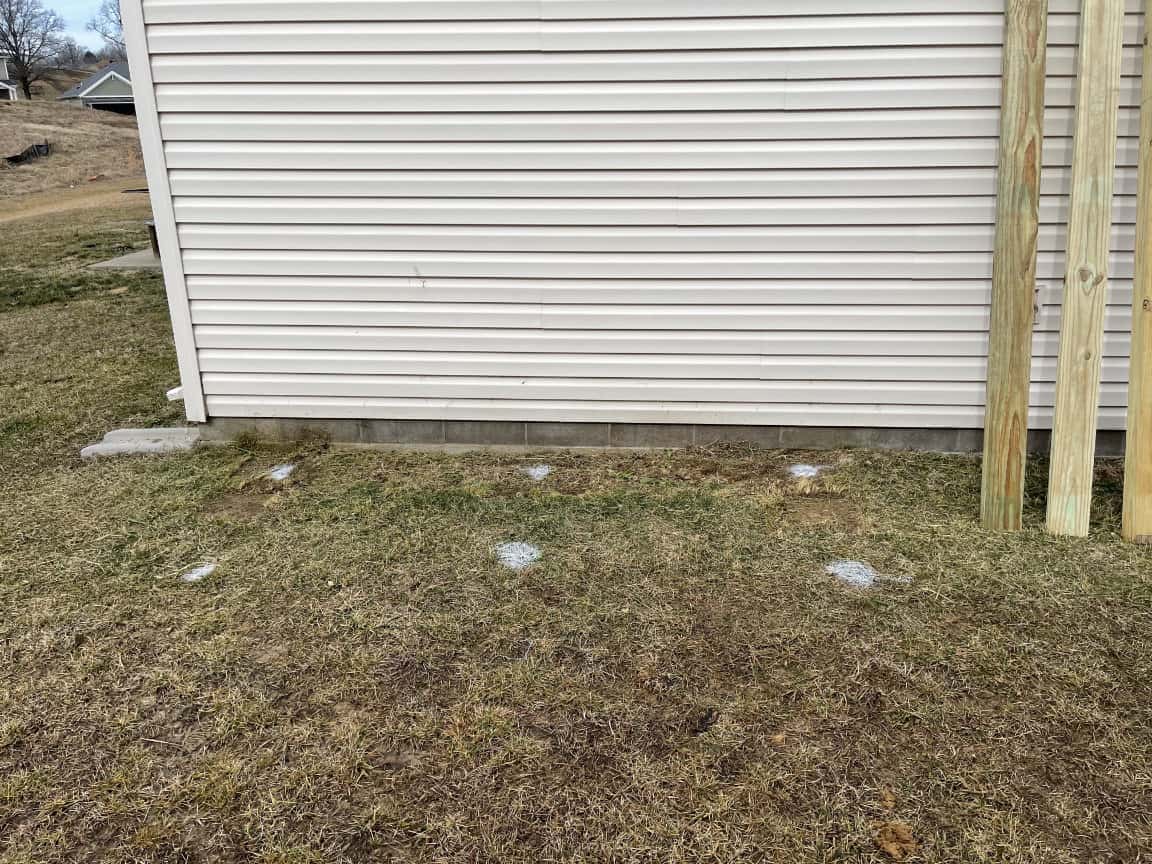
These are the flags and markings put out by the utility marking service. To show you where I’m digging holes and where I’m placing the deck blocks I have spray-painted white circles in those spots. After laying out the blocks on those spots, I spray-painted red dots along the corners so I had a better idea of where to dig.
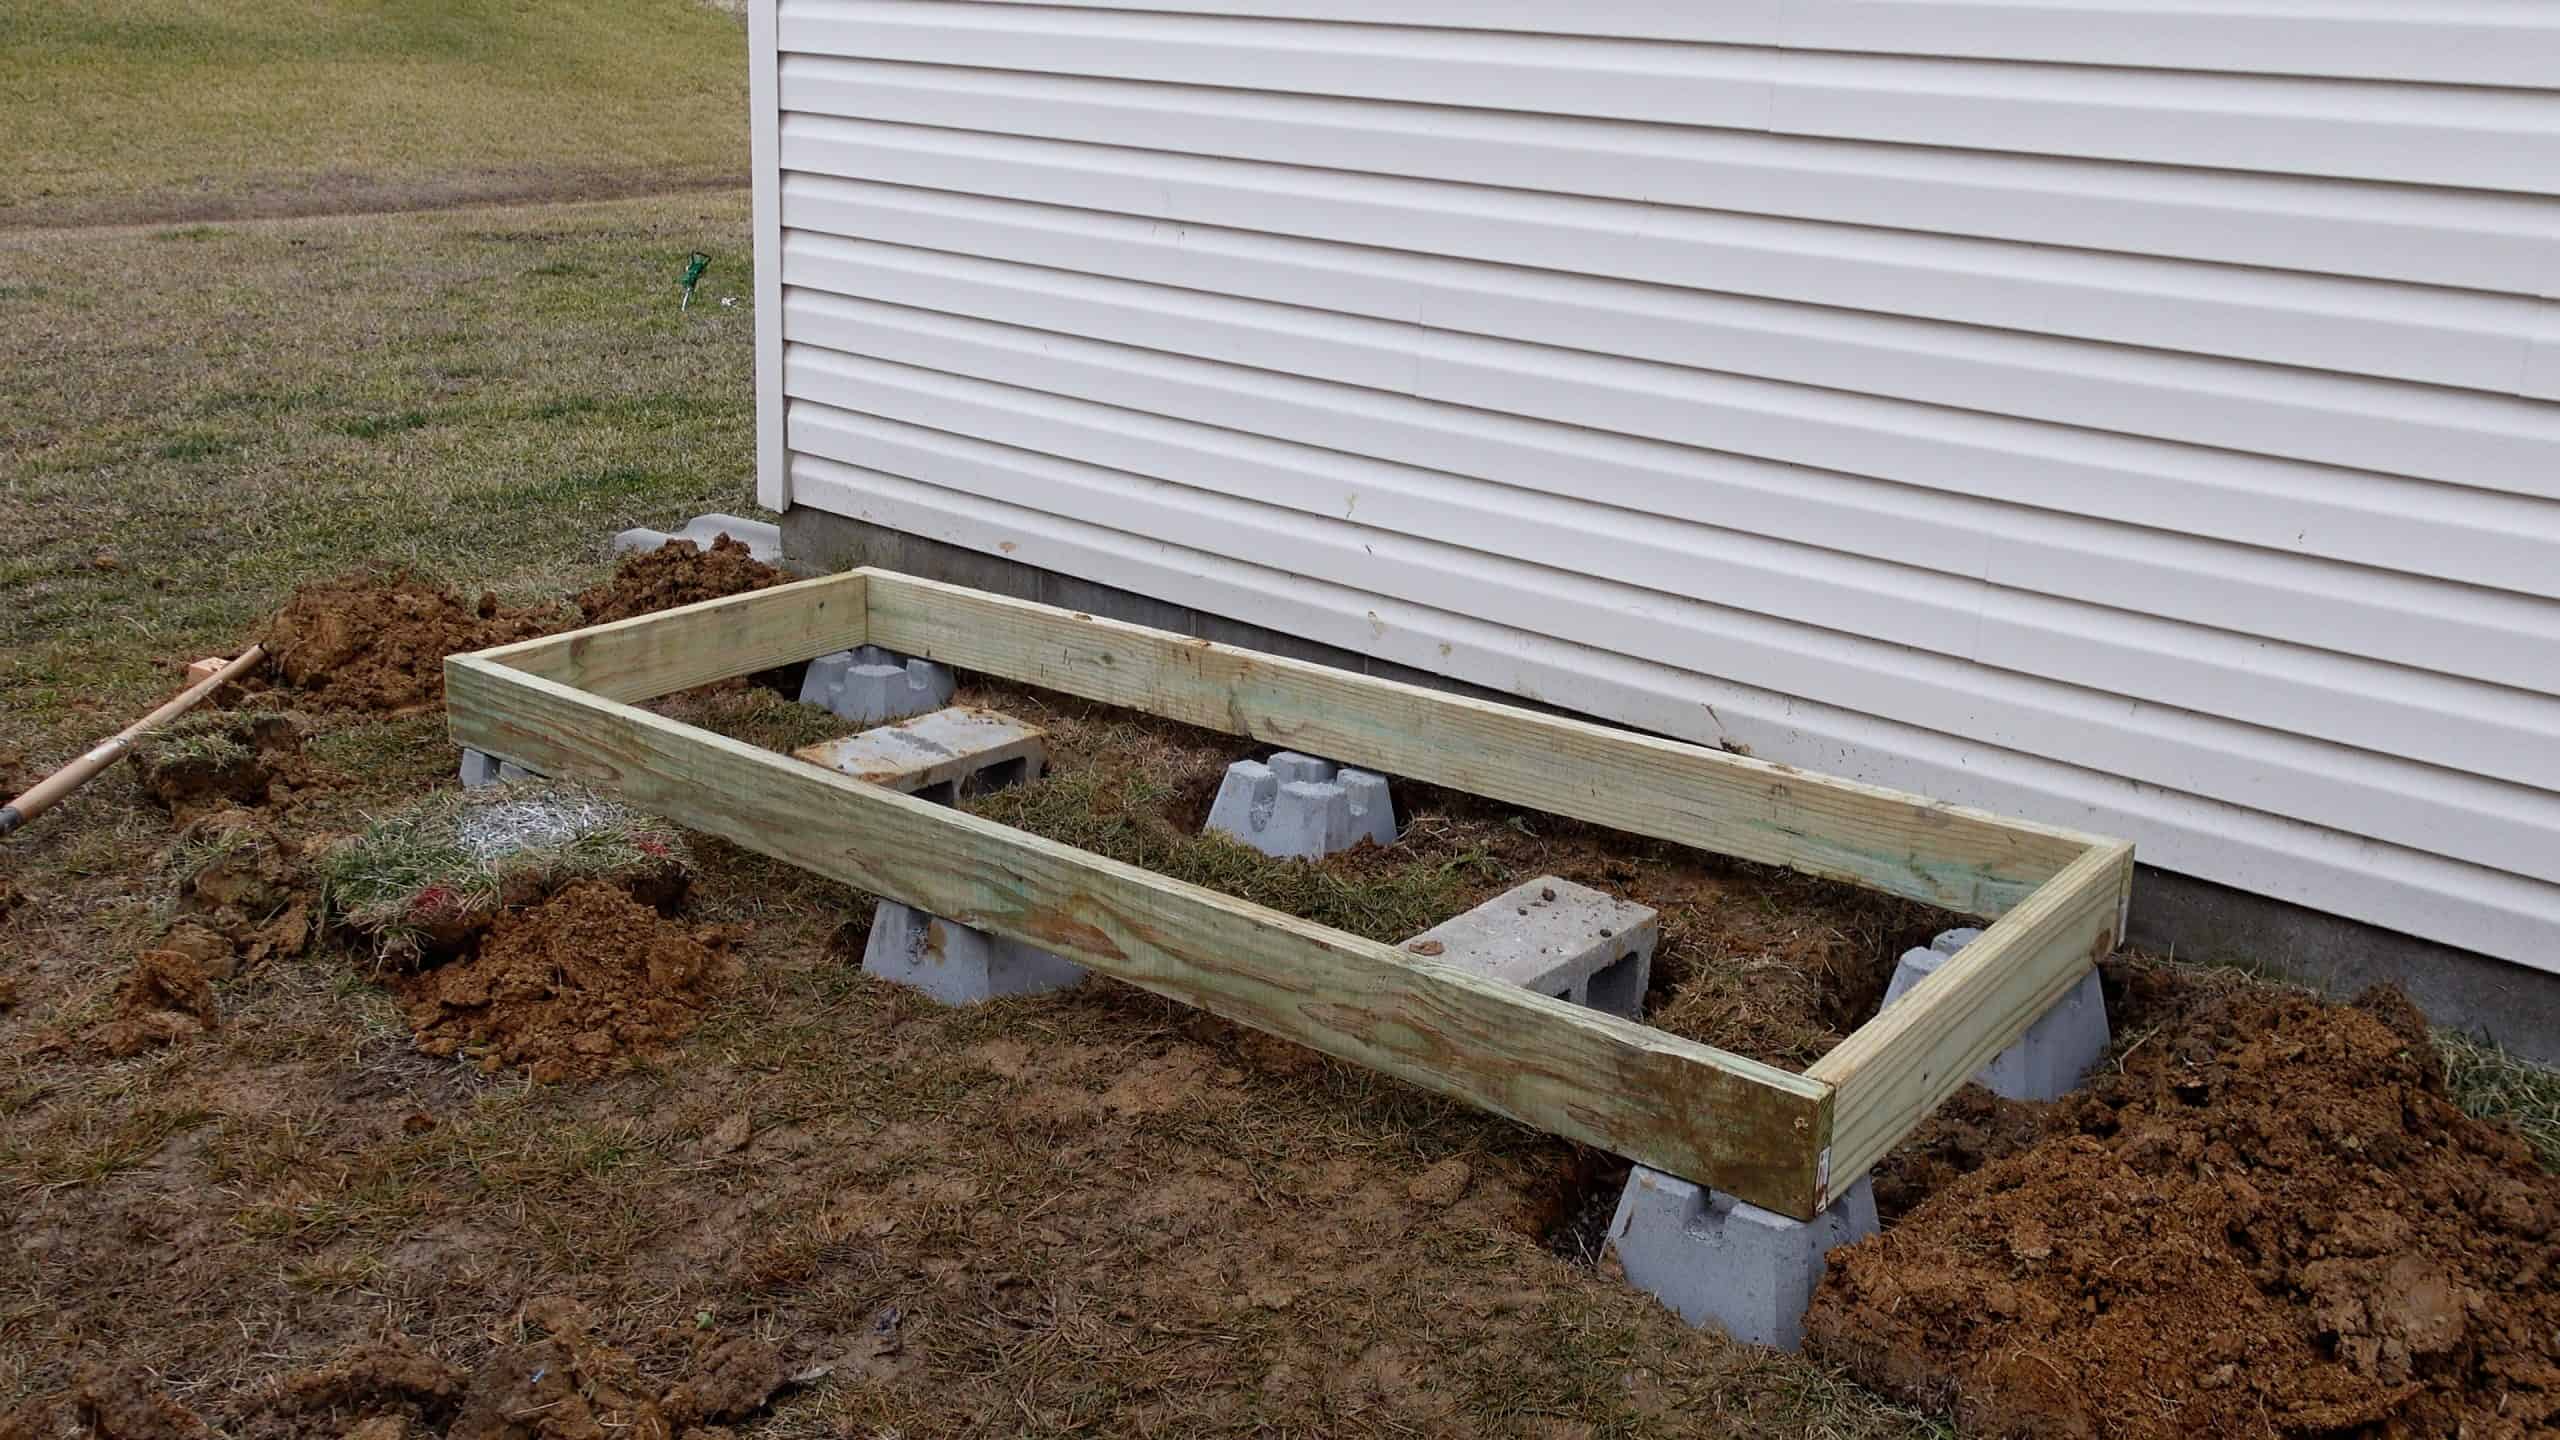
We’ll start by digging 6 shallow holes for our deck blocks and filling those with gravel. Then we’ll place the deck blocks on top. I had only used 2 bags of pea gravel, but again, looking back, more would have been better here.
PRO-TIP
Buy more than you need. Looking better, digger wider and longer holes, and using more pea gravel would have made the process significantly easier. Digger deeper holes would have allowed for more flexibility in adjusting the height of the base. You’ll want more room to work with when you’re trying to level and square the frame up.
I don’t show it later on in the video, but I did have to go back and make some adjustments to the depth and width of the holes. Save yourself some frustration and do a little more work in this step. Take a few of your 2x6s, set them on the deck blocks, and check that everything is level.
I decided to use these 2 cinder blocks I had laying around for additional support in the center of the platform. You can use deck blocks or cinder blocks here, it won’t make a huge difference.
Assembling the Frame
Assemble the 2×6 frame. If you want to make a larger shed, simply expand the size of the foundation. You may need to add additional deck blocks for support – I would recommend a deck block for every 2 or so square feet. I am using a total of 6 deck blocks and 2 cinder blocks.
Why Pressure Treated Wood?
You’ll notice pressure-treated lumber has a green color to it, is often wet, and is very heavy. These pieces of wood have had a number of preservatives added to them to help extend their life.
Wood that is in contact or close to being in contact with the ground is susceptible to rapid deterioration from water, weather, and other natural processes. These preservatives help to ensure the wood remains structurally sound and keep it rot and insect-resistant. Be sure to wash your hands after handling any pressure-treated material.
You can cement this into the ground if you want, but you may have to get a permit as it could be classified as a permanent structure. This design is technically portable or movable in the eyes of the law, at least where I live.
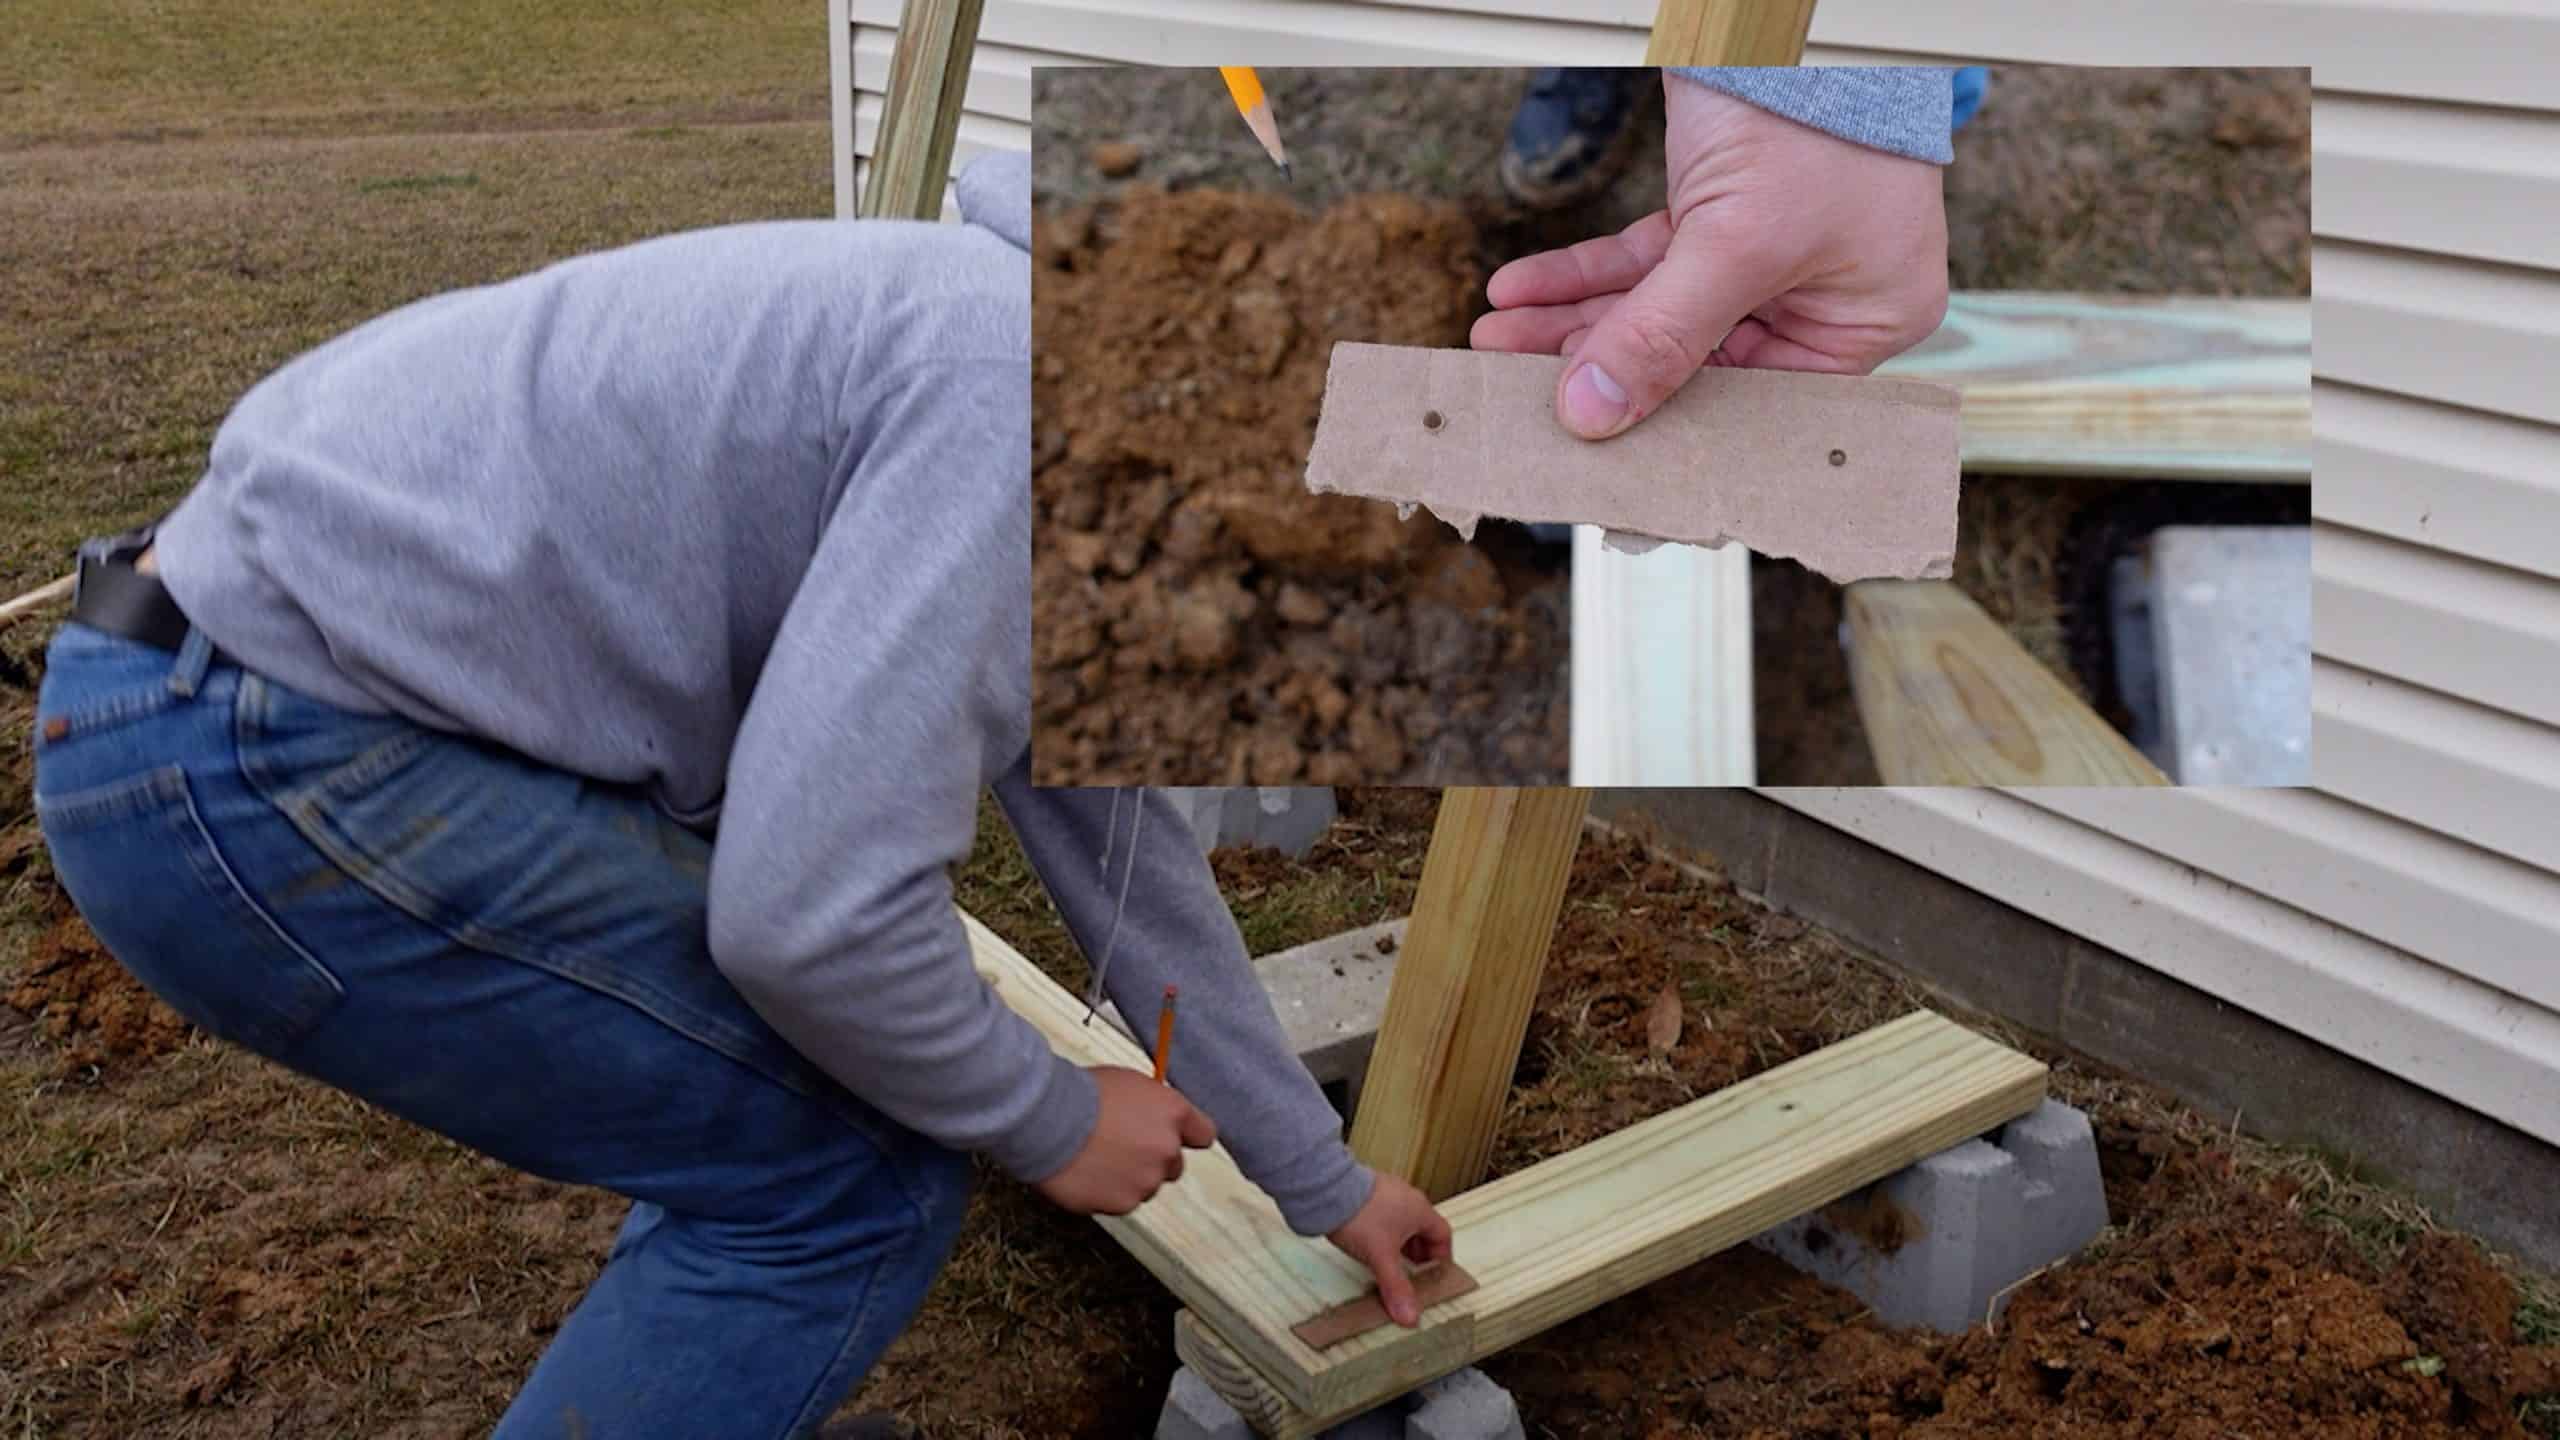
The frame is complete and sitting on top of the deck blocks. We’ll finish assembling the frame by securing the ends with (2) 3” deck screws into each corner. I am using a simple cardboard template to mark where to drill the holes for each screw. You will want to drill holes prior to inserting the screw so you don’t split the wood.
This is a simple cardboard template, 5.5″ high, the same height as the 2×6, with holes about an inch in on each side to evenly mark the holes.
I start with putting the top screw in one side, then the top screw in the other, and then inserting the bottom screws. This gives me some flexibility to ensure the 2×6 is flat and square and reduces crookedness as much as possible.
After getting one side done, I flipped the frame over so I didn’t have to work in the tight space close to the house. This, unfortunately, was a big oversight later on.
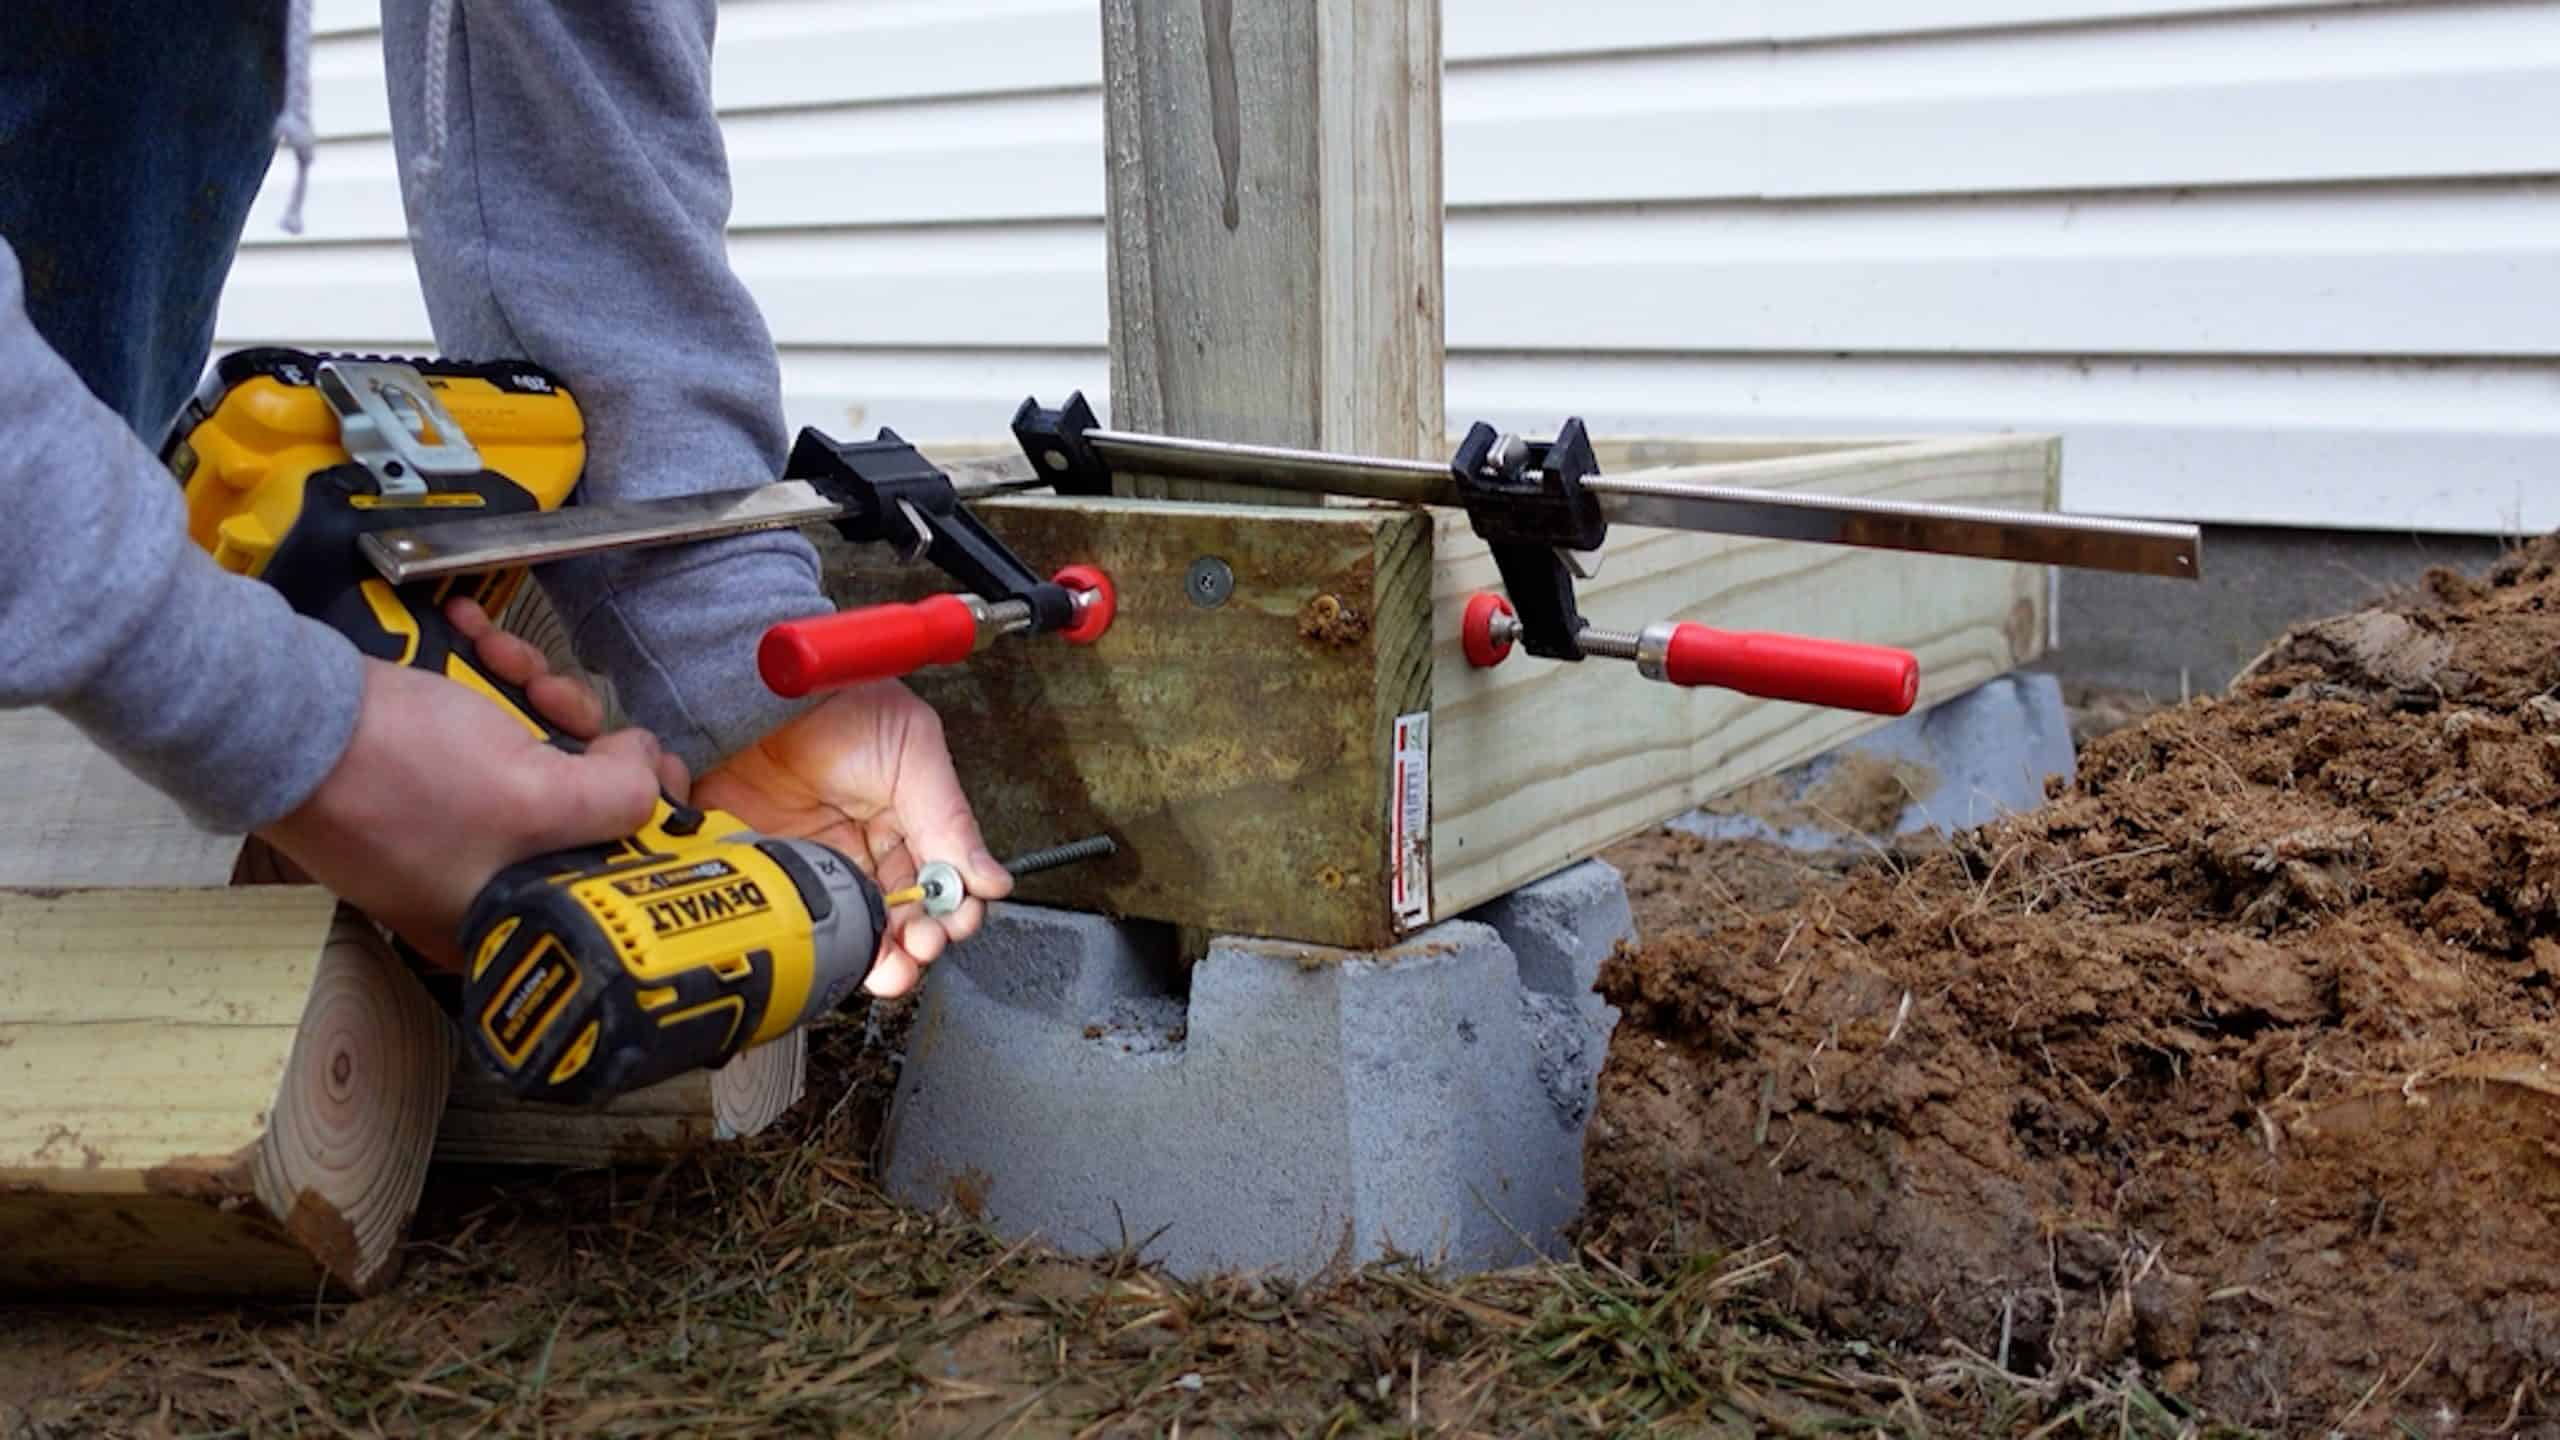
Now I’ll start inserting the 4x4s. I have cut each 4×4 to 6’ in length and am using a clamp to help hold them in place while I insert the lag screws. I am using the same cardboard template to roughly line up where each screw should go.
Using two clamps, I can hold the 4×4 in place while inserting the lag screws. These 4x4s will rest in the center cut-out of each deck block. You’ll want to clean out any concrete bits from the center of the deck block so the 4x4s can sit as flat and square as possible.
Here’s where I overlooked a crucial step that added some significant time to the project. As you can see I have about 6” or less of space to work with between the house and the shed. I luckily have this 90-degree bit adapter that is will work with an impact driver, so I can get the job done.
PRO-TIP
Buy one of these 90-degree adapters ASAP! Even if you don’t need it now, you will need it sometime in the future. I bought mine 3 months ago and when it came time to film this video and write this article, I was very grateful I spent the $20 months ago.
We recommend Dewalt’s Impact Ready 90 Degree Right Angle Attachment
However, it was far from easy to do it this way. Looking back, it probably would have been better to assemble the frame of the deck blocks and attach the 4x4s then, making sure to account for the depth of the deck block cutouts. At the same time, you might need someone else with you to help left and line it up, so maybe this was the best way – hindsight is 20/20.
Next, I am inserting the platform joists that go around each post. I am using my cardboard template again and then placing two 3” deck screws for each. For the middle section, I inserted a scrap 4×4 piece to help align those supports. I’m not pre-drilling any holes here since the screws are closer to the center of the wood and there’s low chance anything will split.
Same thing as before, I am starting with the top on each side, then placing the bottom screws in, just in case I need to make some adjustments. With the platform complete, we’re going to lay down the flooring.
Laying Down the Floor
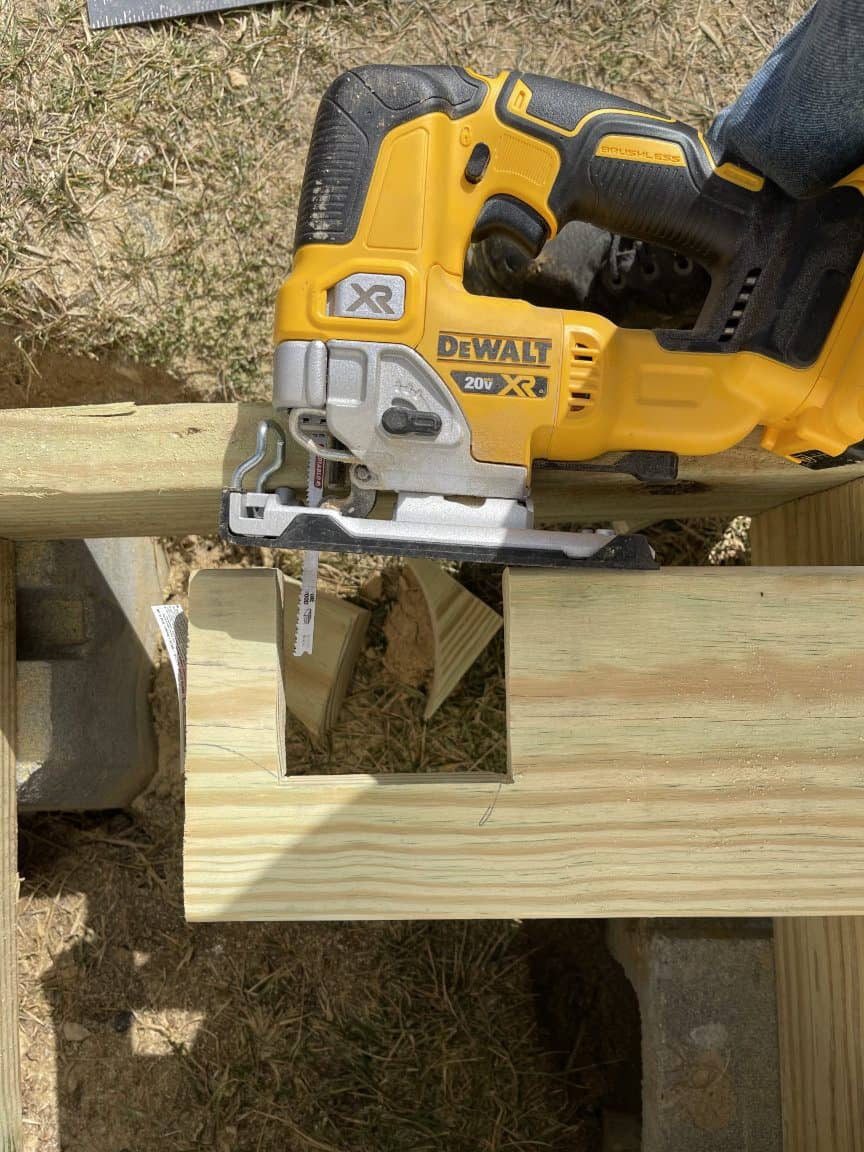
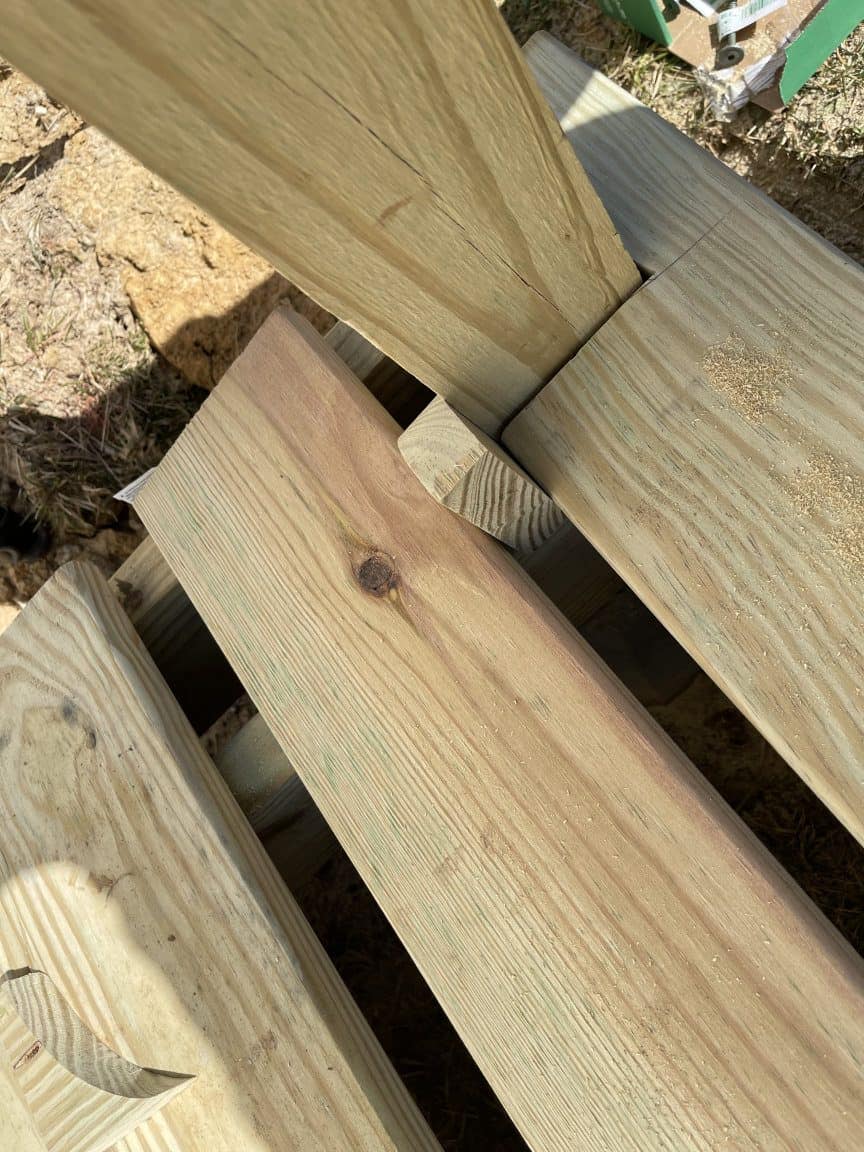
First I’m going to cut out the spaces for the corner posts. I made a mark that roughly showed where the sides of the 4×4 were and then used a scrap piece of 4×4 to get an idea of the depth. Again, I would recommend making this cutout bigger than you think you’ll need so you have some flexibility in lining the piece up.
Don’t forget that for the rear piece, you’ll need to make a cut-out for the center post. Using 3” deck screws, screw down the front and rear, being careful not to break off the ends as I did on the front right side. Insert a screw into each crossing support.
Here I have marked the corner post to give a rough idea of where to start the cut.
The cut doesn’t have to be pretty, but it does have to be large enough to get around the post with a little wiggle room.
Don’t forget to cut out the center for the rear floor piece.
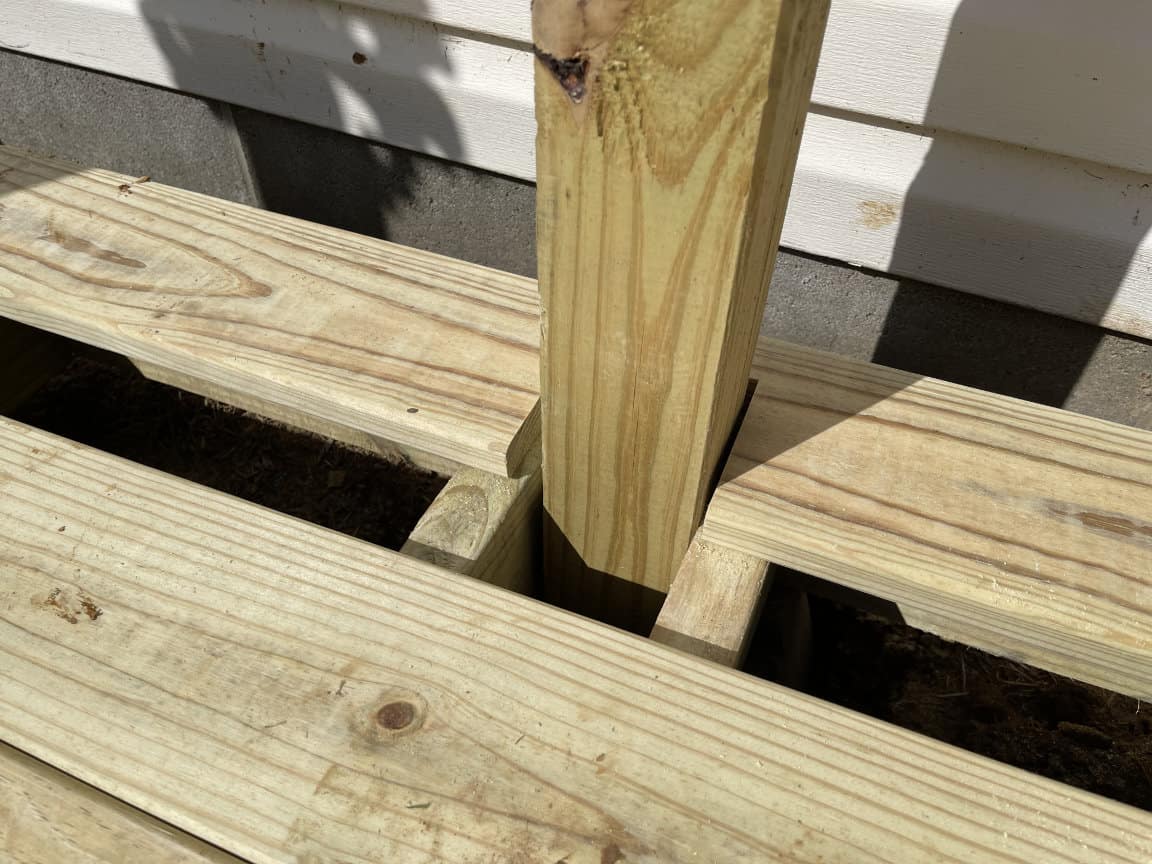
Save a few of these quarter-circle scrap pieces, we’re going to use them for spacing. Take those scrap pieces and place them between the corner posts and your next floor piece. Screw this piece down and then move the scrap pieces to the rear side to line up that piece.
These scrap pieces will not line up perfectly for the entire depth of the flooring. However, they will line it up enough on the ends that I am able to eyeball the distance as I’m working my way to the center.
These scrap pieces work great as spacers.
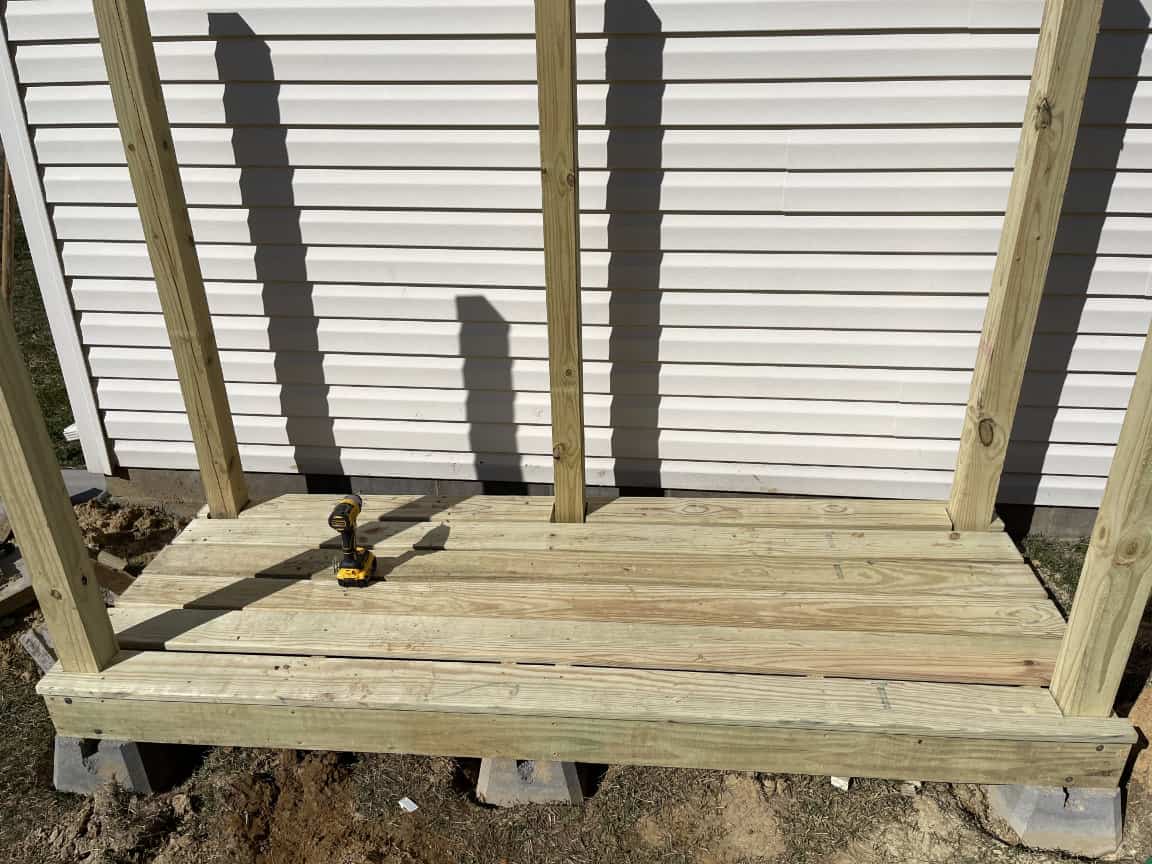
The finished floor.
Attaching the Sides and Roof Support
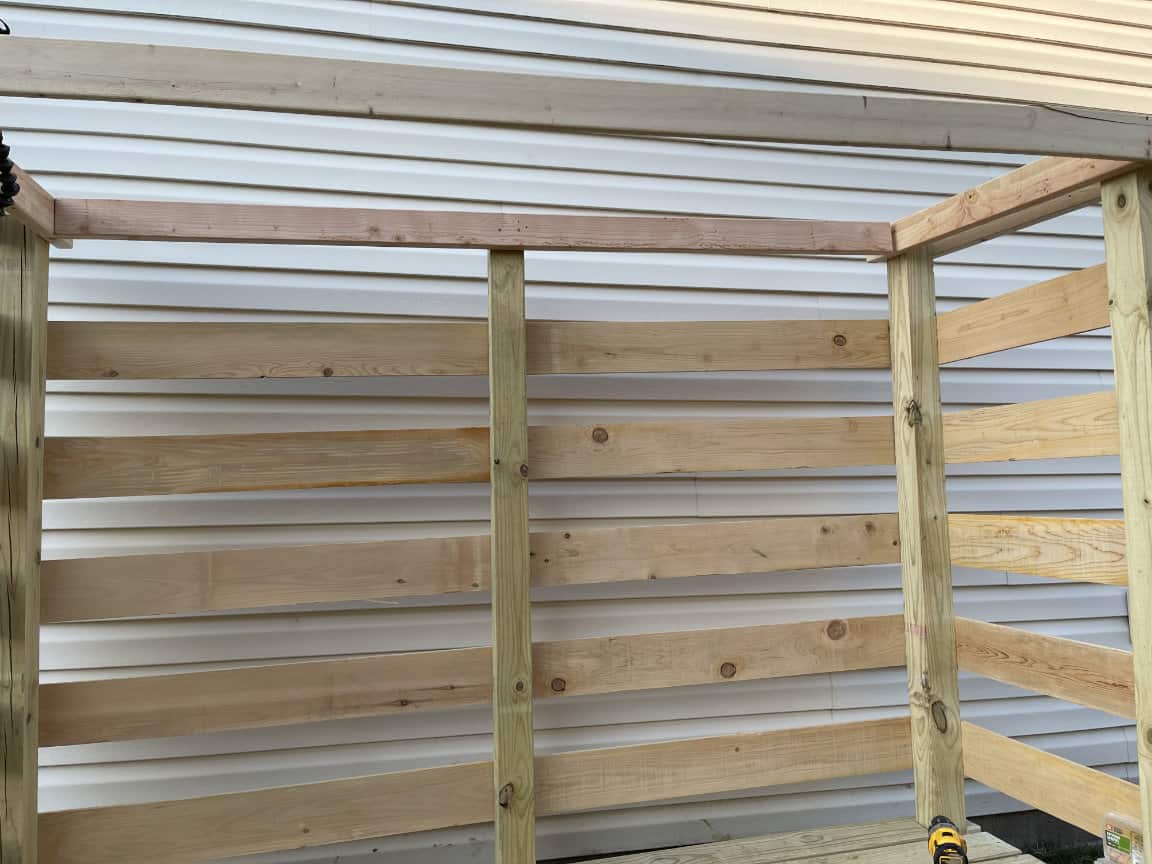
With the flooring complete, we’ll work on attaching the sides . I am using cedar fence pickets – they’re cheap, lightweight, and rot and insect resistant. These are sold in 6 foot lengths, so to cover the backside, you’ll need to cut them to meet halfway on the middle post.
The theoretical measurement comes out 46.5”, but double check yours to be safe.
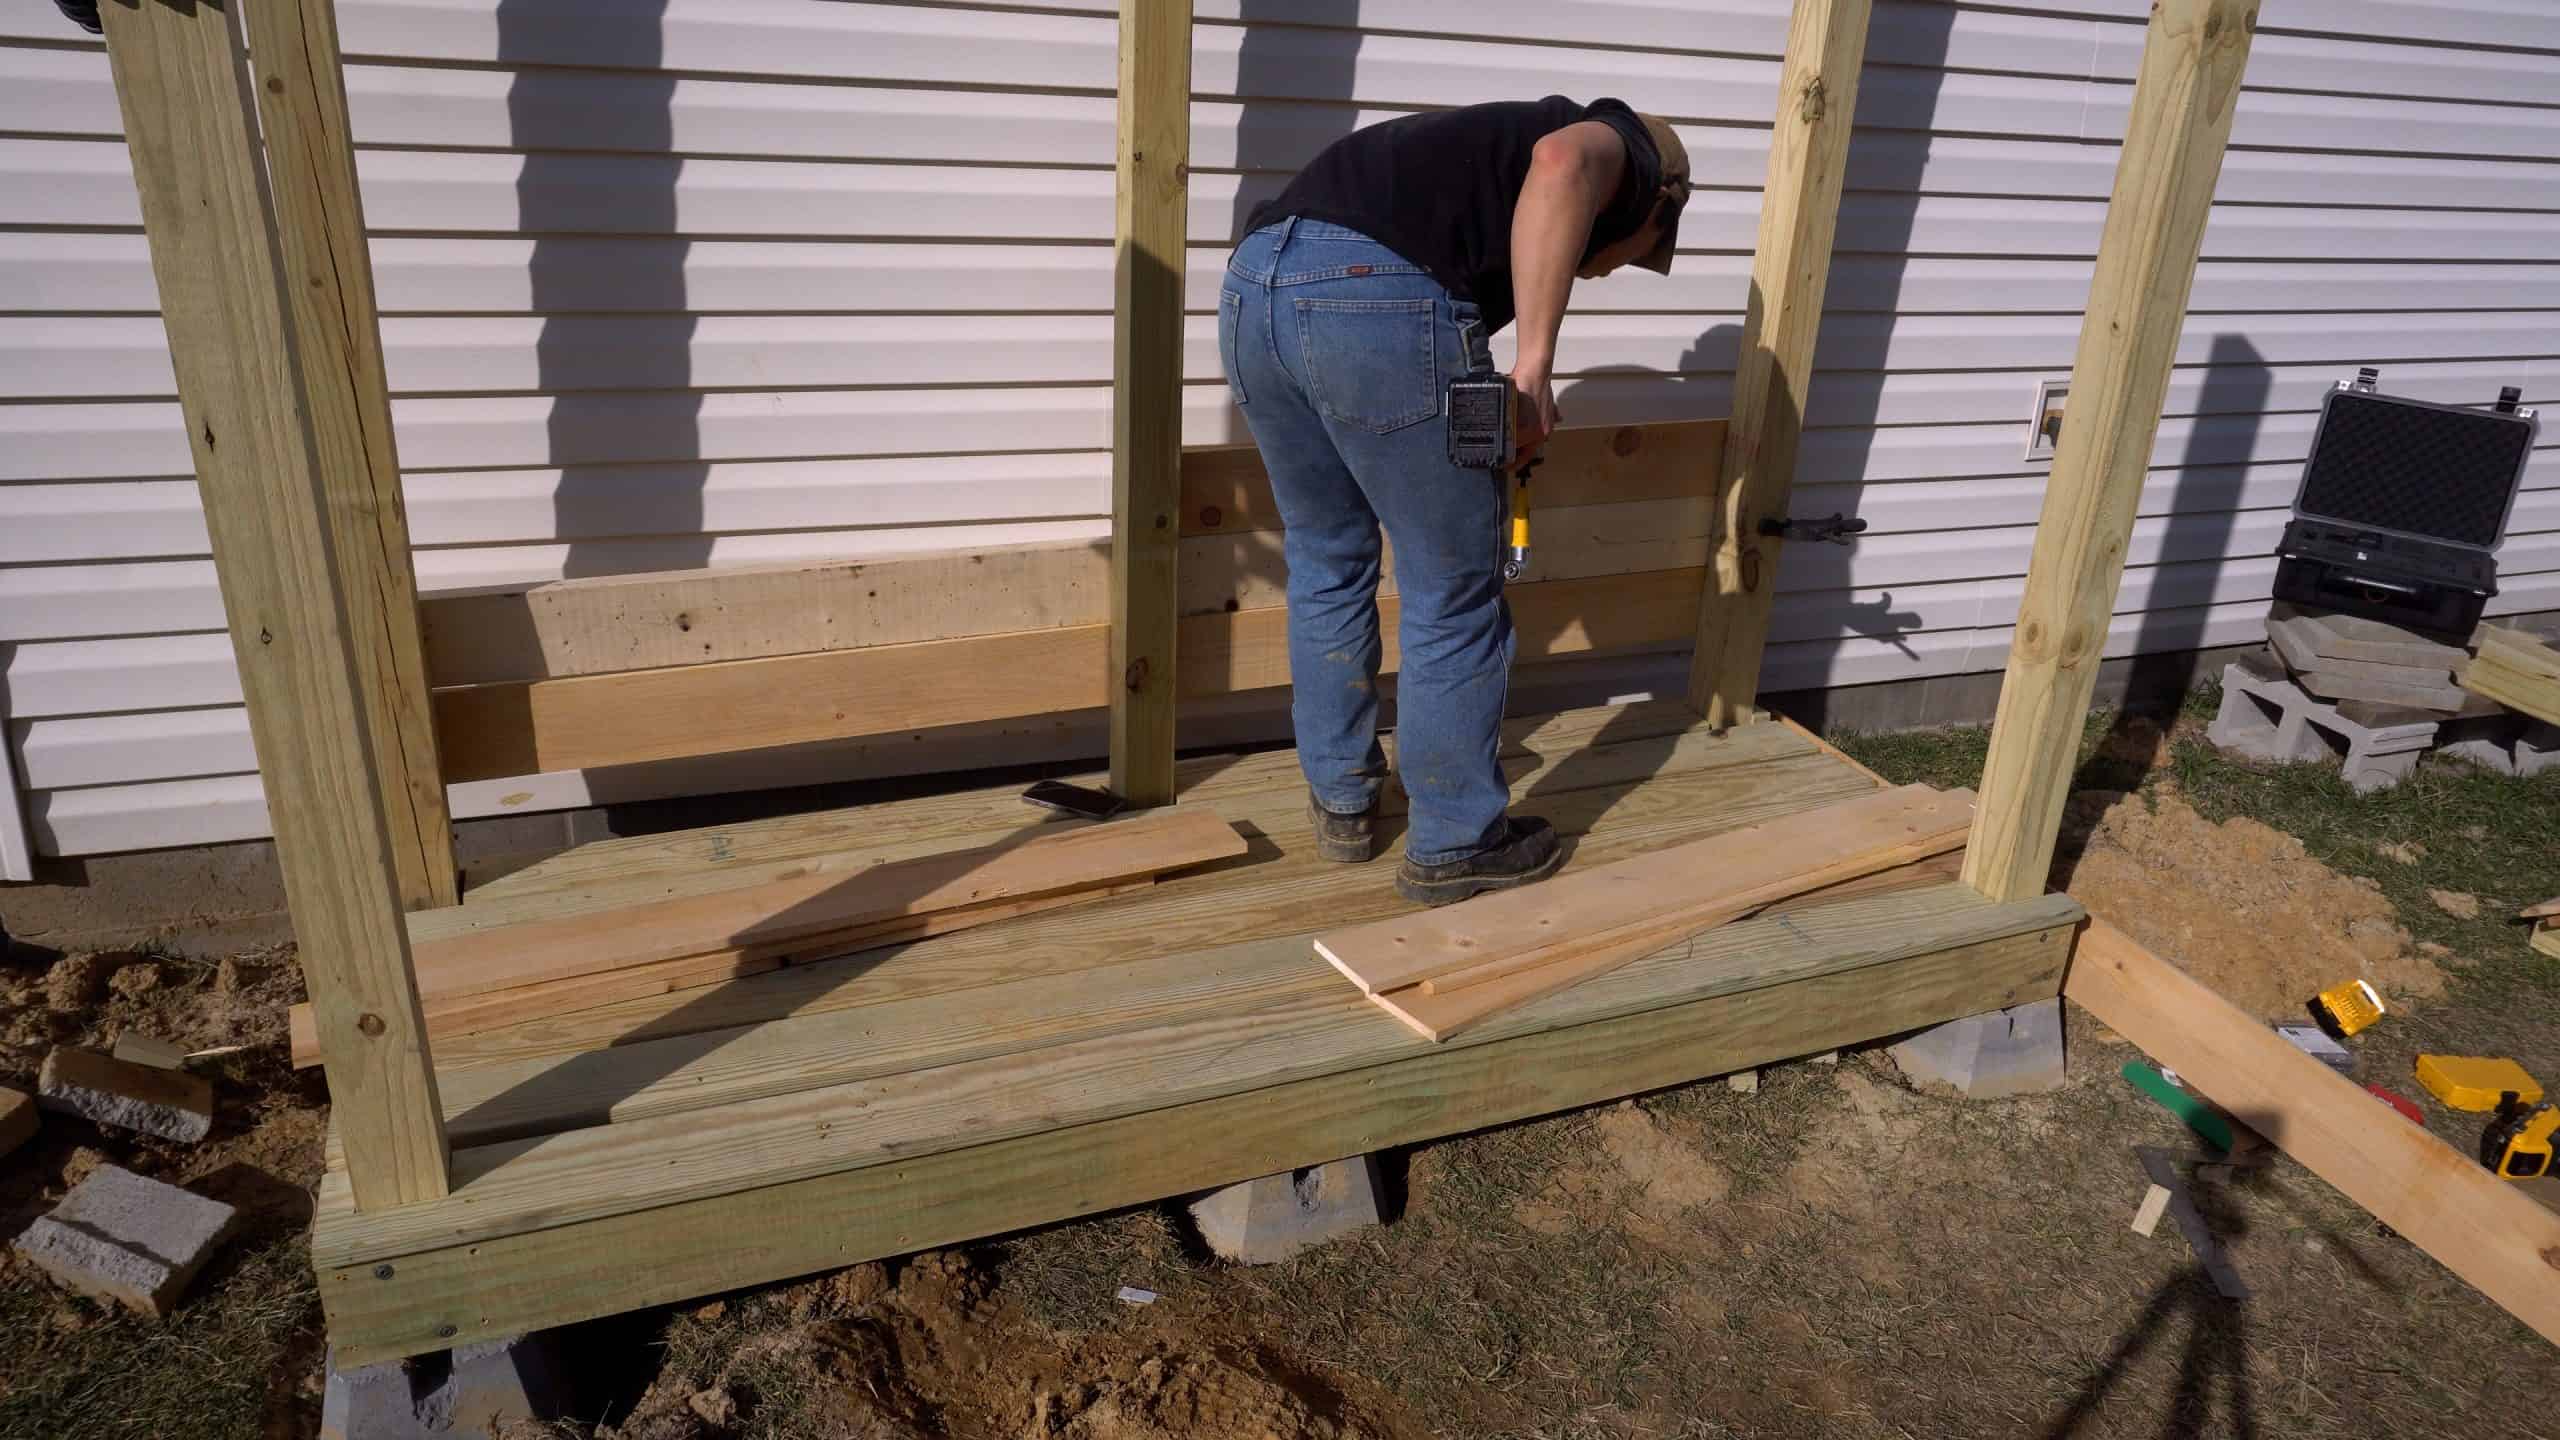
I started by placing a regular 2×6 on the bottom and using a clamp to hold it in place. Then I sat the cedar planks on top of it while screwing them into position. Then I moved the 2×6 up and repeated the process. I did the same on the sides with the cedar plank that also measured the same width.
Here you can see the lighter in color 2×6 clamped on the right-hand side. This 2×6 serves as a spacer to evenly screw the cedar planks into position.
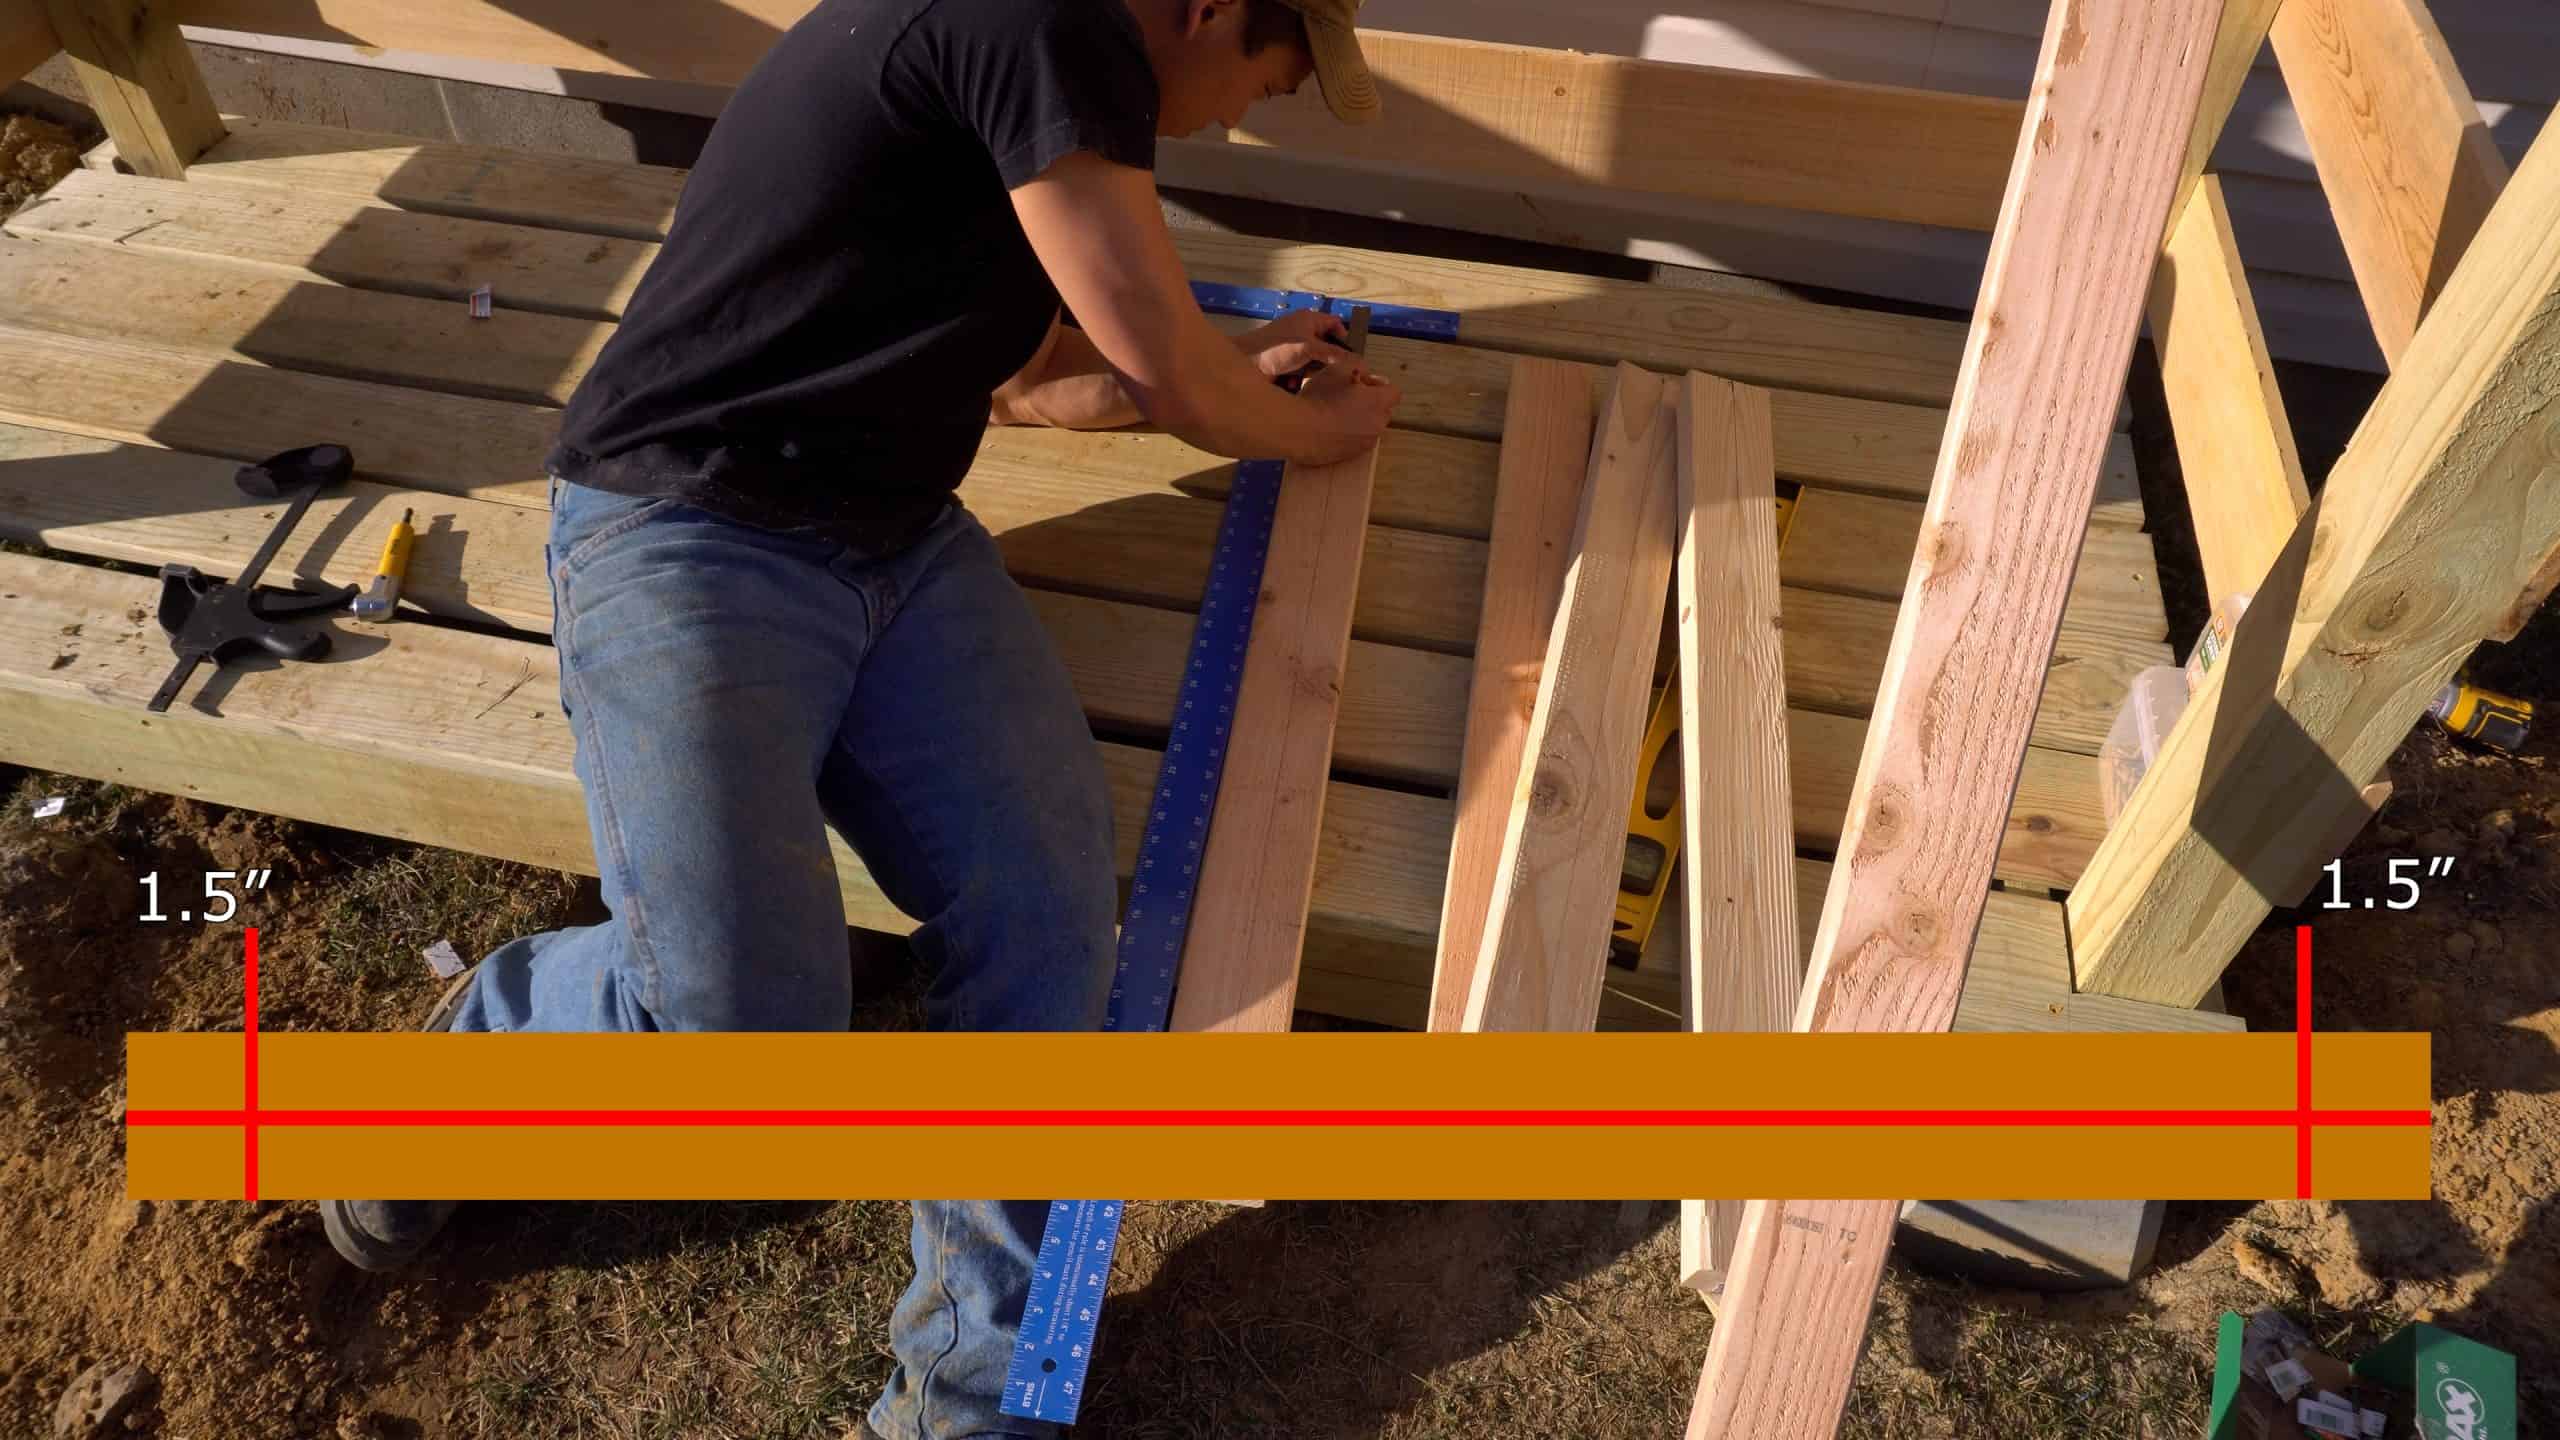
Onto attaching the roof. I took these 2×4’s that are cut to 3’ each, marked the center of each, and then using a straight edge, drew a center line across the middle. Then I made a mark that was 1.5” in on the center line for each side.
This shows where you need to draw lines on the 2×4. These lines will help you ensure everything is level on the 4×4 posts.
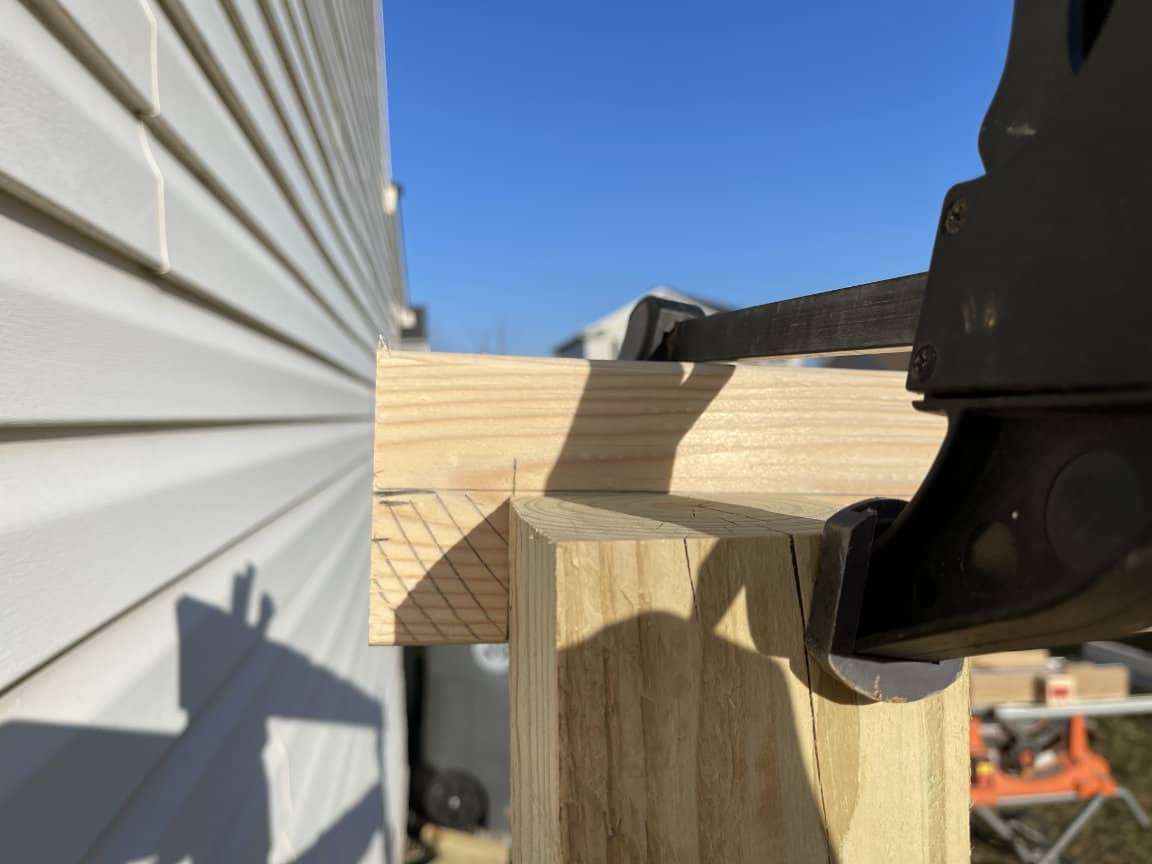
I then lined each of these corner markings up on the 4×4 posts and clamped them into place. You can see in this photo, the shaded area should be showing. These markings help make sure everything is lined up correctly and will look even from the sides.
Notice the pencil lines slightly tilt down towards the right. This shows the slow where the 2×4 dips towards the front to allow rain to fall away from the house.
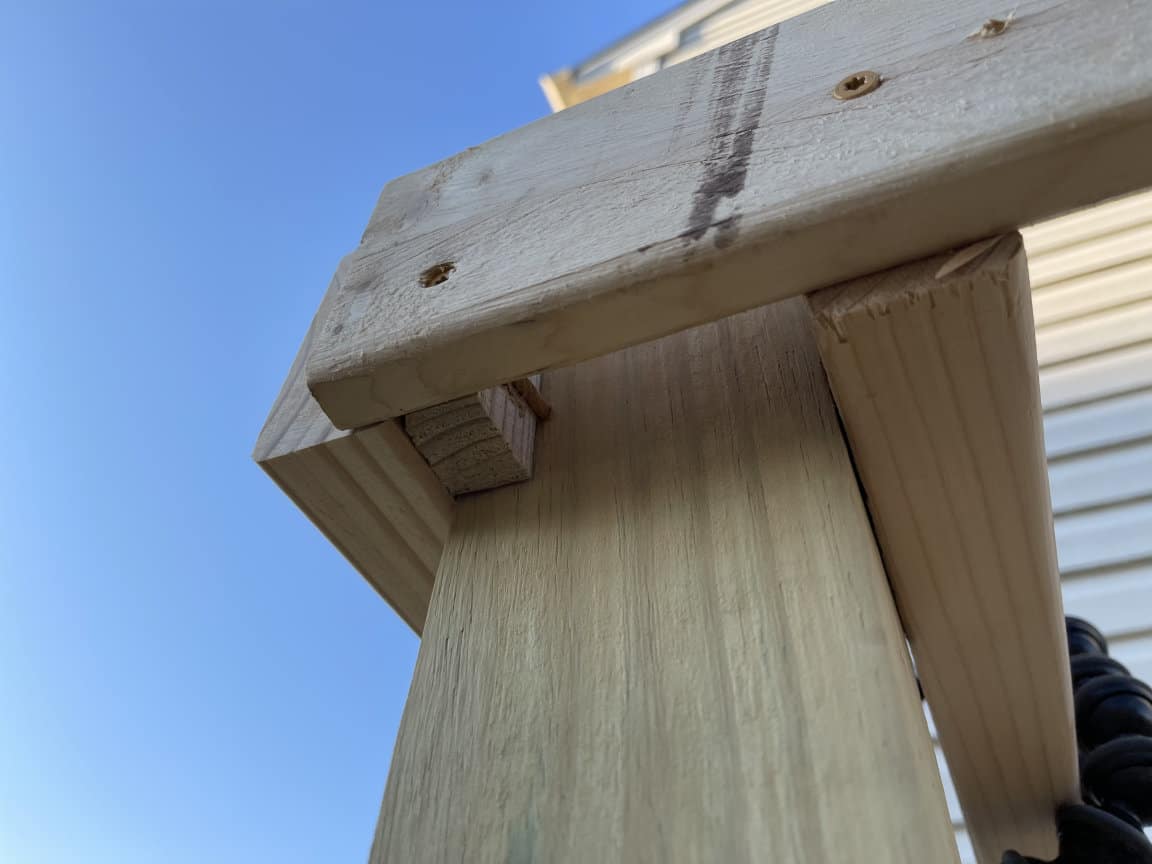
After clamping the rear in place, I slowly adjusted the front of them down to create the slope that will allow water to drain off and away from the foundation of the house. I simply tilted the front until the 2×4 was slightly above the post, so the roof won’t hit it.
After getting the first side on, lining up the opposing side is a bit easier and you only need to clamp the center.
With the side supports up, now I’ll put up the rear and front support. For the rear, I lined up a 2×4 to be even with the sides and clamped this to the center post while I screwed it down. I then placed screws through the side supports at an angle to keep the rear support lined up.
This will not be a weight-bearing roof so I’m not too concerned with strength here. It only needs to be able to stand up to some rain and a little bit of wind. For the front, I thought using a 1×4 would suffice. I was wrong. Use a 2×4, you’ll see why here shortly. I started by clamping the 1×4 to each of the corner posts then pre-drilling before attaching screws.
Unfortunately, something went out of square somewhere. You can see that the front is slightly wider than the base. Maybe it was the wood, maybe the ground shifted, or maybe it was me. I’m not sure at this point, but it didn’t have to look perfect – remember, it’s storing firewood.
You can see I made a small error here.
Attaching the Roof
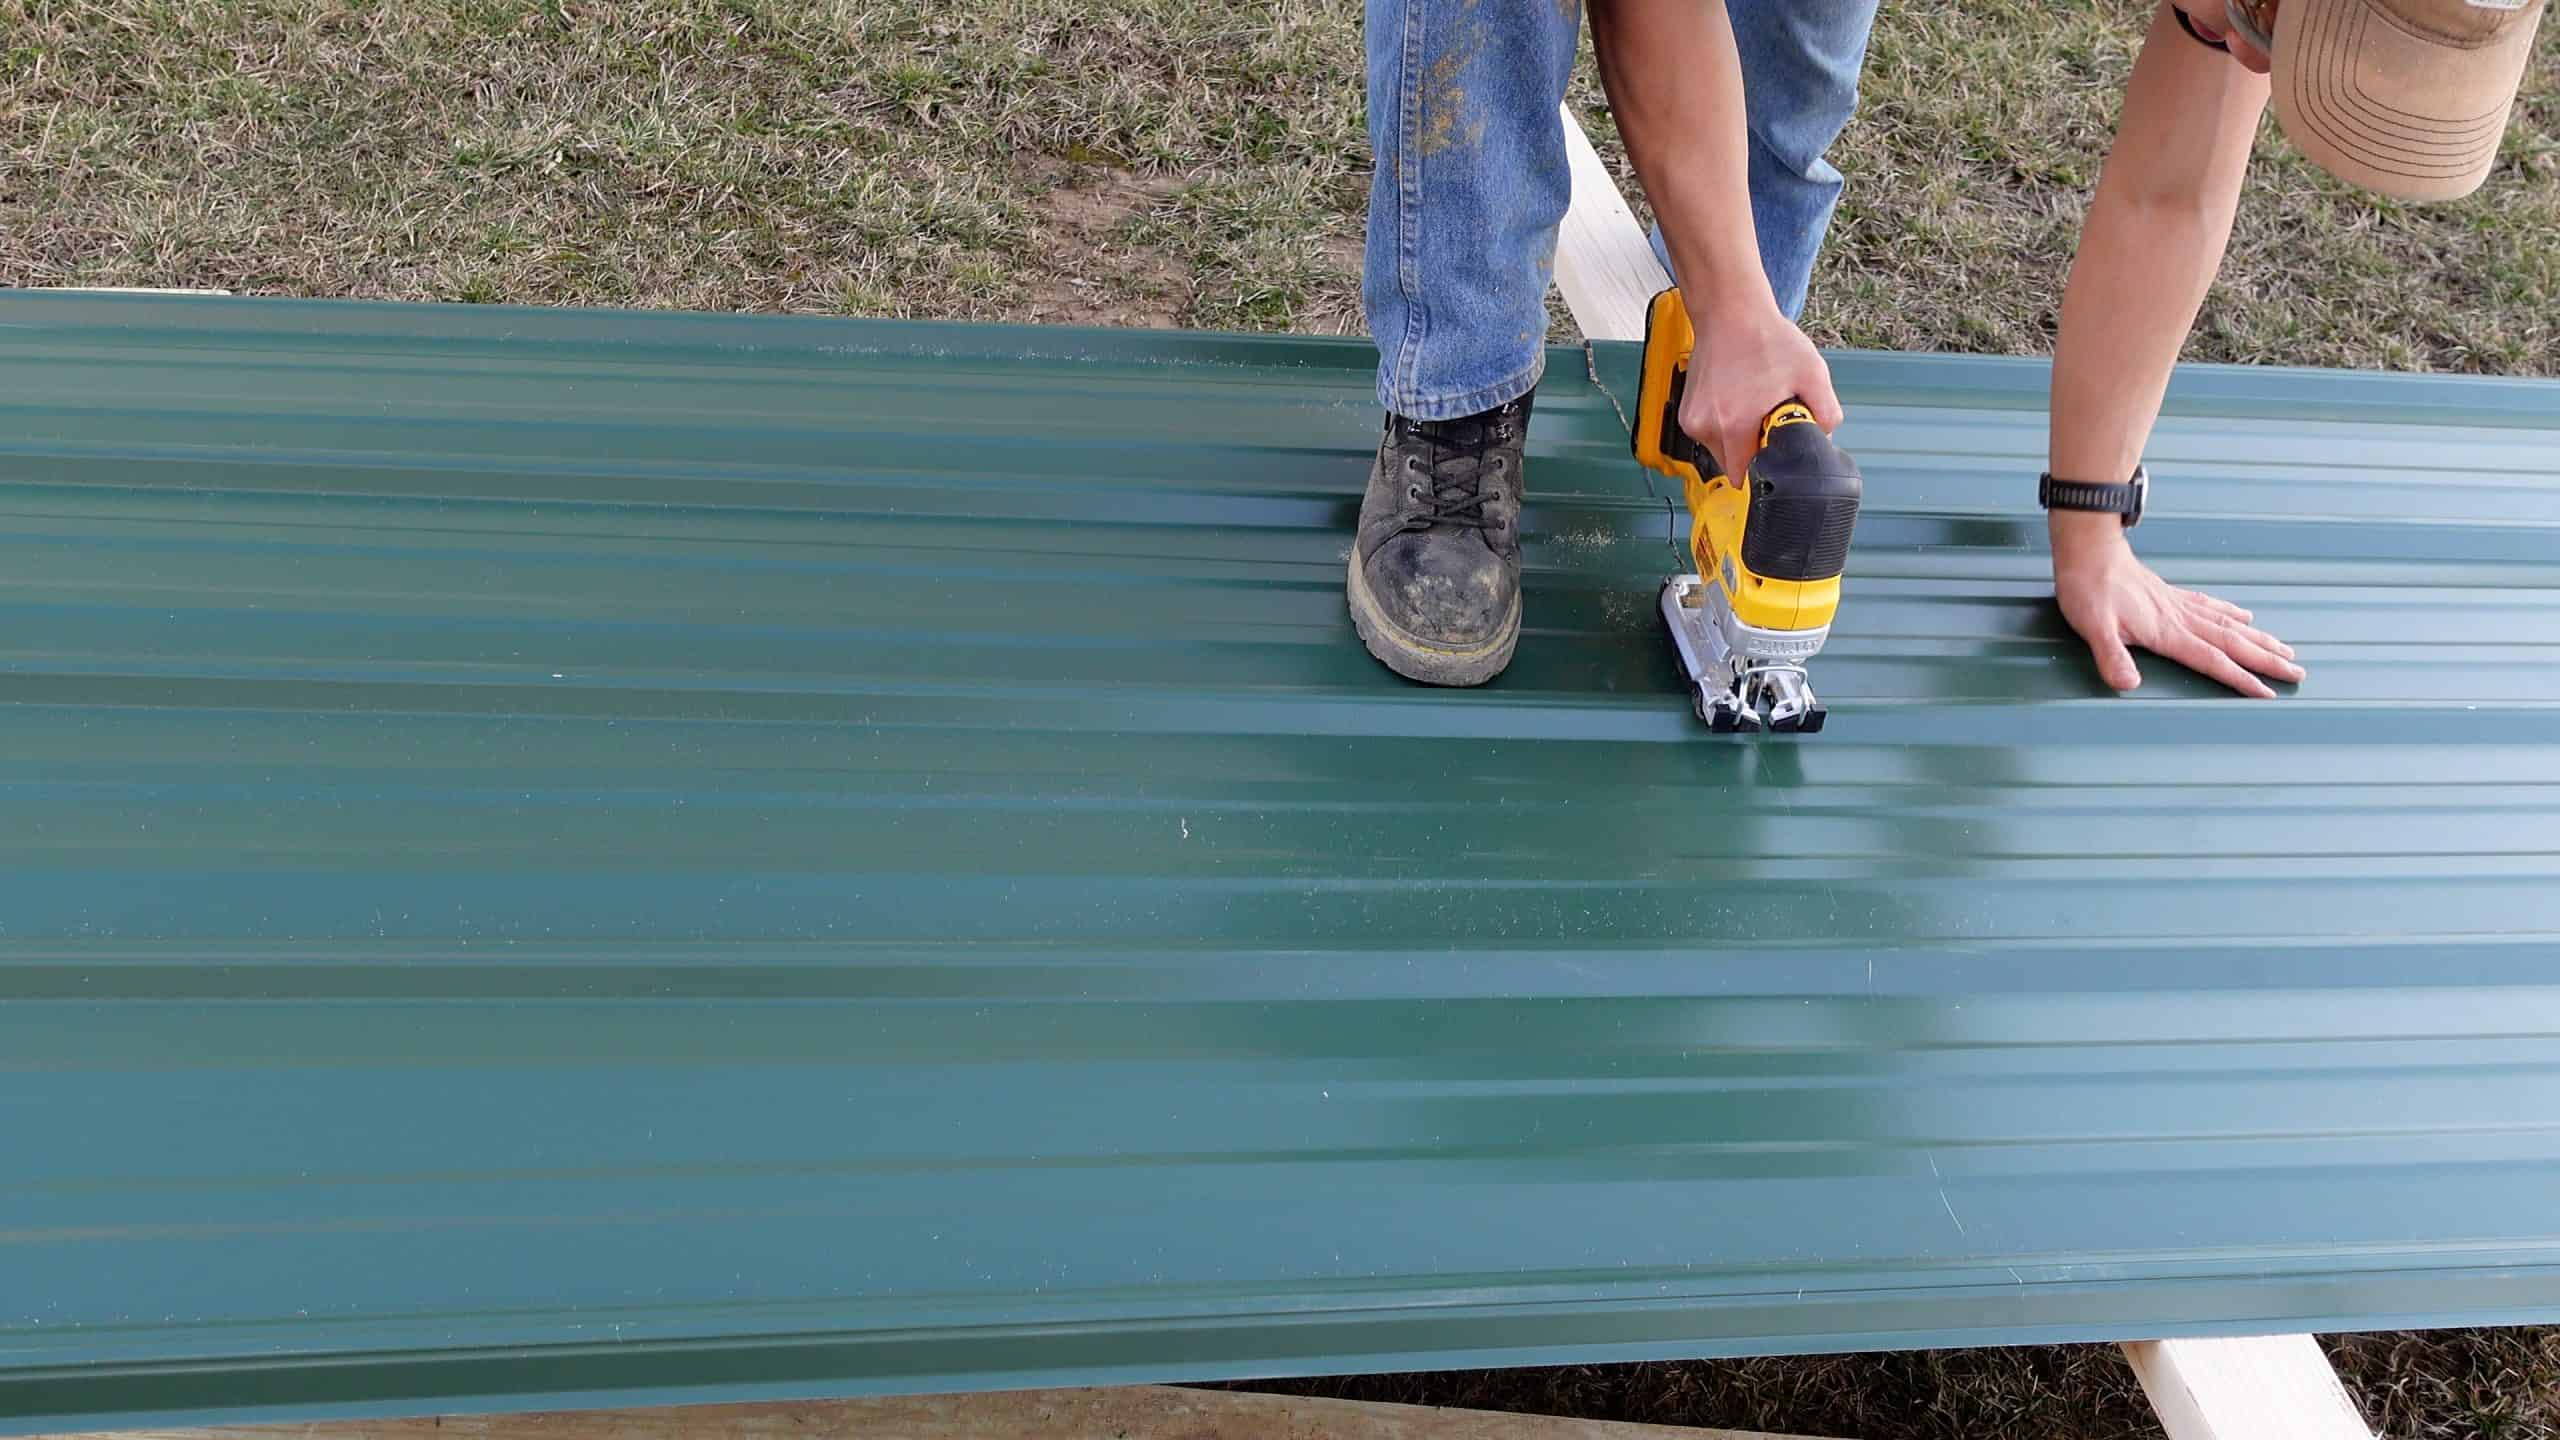
These pieces of sheet metal roofing come in 3’ by 8’ sections, so I needed to cut 2 pieces in half to get them to fit and allow for some overhang. I used my jig saw with a metal cutting blade cut these down to size. You’ll want to put some scrap pieces of wood alongside your cut so the metal doesn’t shake and move as much.
Place 2 pieces of wood on each side of your cut so the sheet metal does not shake and vibrate so much.
DON’T FORGET
It can be tempting to place the sheet metal horizontally, but don’t do this! The water will not drain properly. Make sure the ridges in the roof, following the slope of the roof.
After cutting the sheet metal, it’s a matter of lining them and their seams up on the top of the shed. The screws I’m using are self-tapping and have a washer attached to them. No pre-drilling is needed and the washer will help prevent water from coming through the hole.
I started by putting screws on the corners first and then working my way inside. Ultimately I decided I wanted to attach the sheet metal to the front support and a 1×4 wasn’t going to cut it. This is why I said earlier to use a 2×4 here. I took a few 2×4 scrap pieces and drilled them to the 1×4 so the roofing screws would have something to bite into.
Now it’s time to load it up. The wood I bought is already seasoned so I’m stacking one right on top of the other rather than using the log cabin style of stacking. If this wood was still green I would probably opt to use the log cabin style since it allows more air to flow through.
And that’s it, your firewood storage shed is complete! If you’re interested in another project, check out the video I did for this fire pit table. Perfect for keeping kids and pets safely away from the fire pit.

