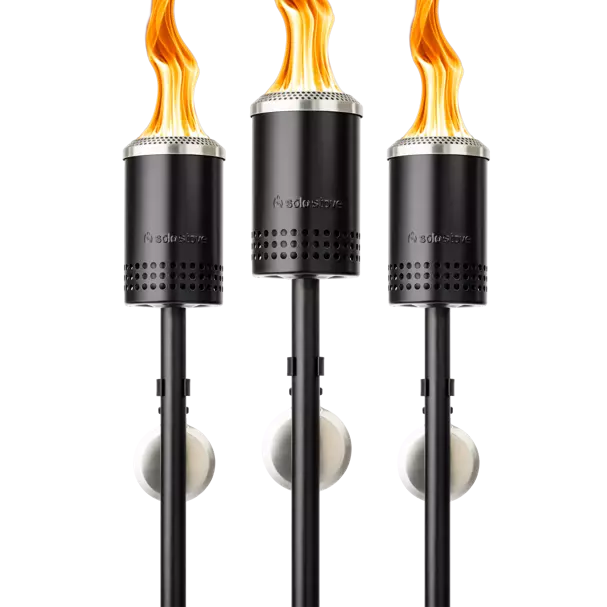
I have never been a fan of the Tiki Torch look, mostly because the traditional design was something my grandparents would have back home in Hawai’i. But the Solo Stove Torch took a drastic turn from the norm, and I was intrigued. After testing the Torches for an entire breezy afternoon, I learned that they were easy to assemble. From start to finish, you can open the box and have a roaring flame outside in about five minutes. It is just as easy to take apart when you are done and store it inside.
Lightweight with a small footprint, the classic Solo Stove design means no smoke once it is up and running. It is one of the best Tiki-style torches to bring on the road or set up for a smokeless ambiance. Want to learn more? Keep reading this Solo Stove Torch Review.
Take backyard torchlight to new heights with Mesa Torch by Solo Stove. With its exceptionally large flame and a super-durable, variable-height frame design, Mesa Torch is made to light the way to the ultimate backyard vibe season after season, year after year.
Key Features of the Solo Stove Torch
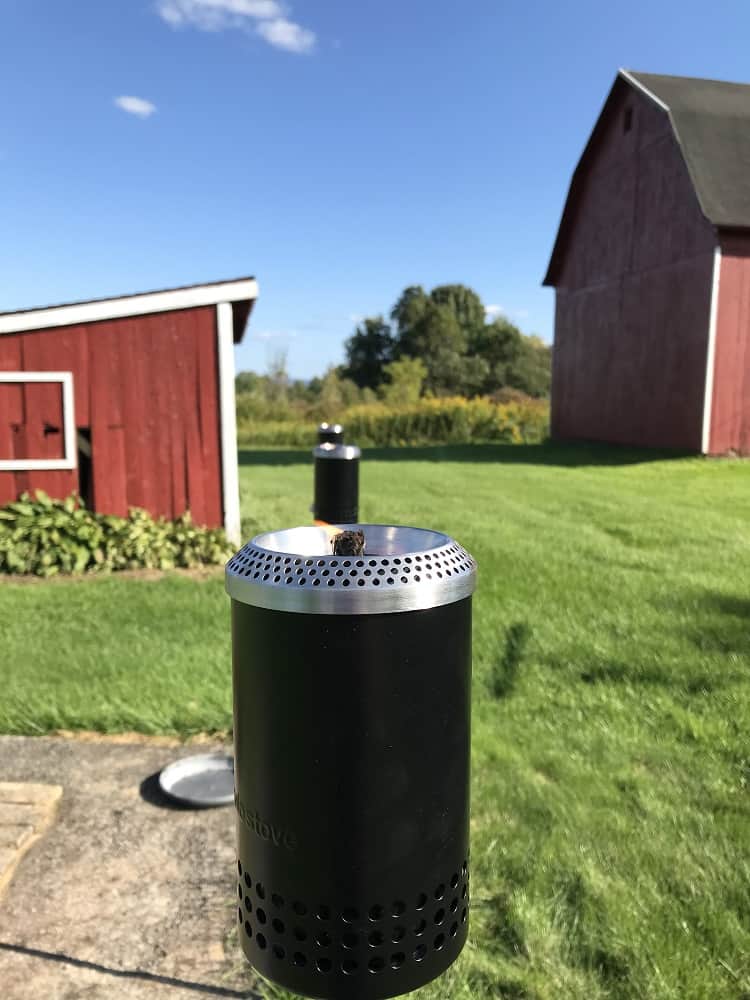
This product is designed to be a tiki Torch, but one that is brighter than your average Torch, easy to assemble and disassemble, and just as quickly brought on the road. The integrated fuel canister is meant to provide an extra large flame pattern for optimum illumination.
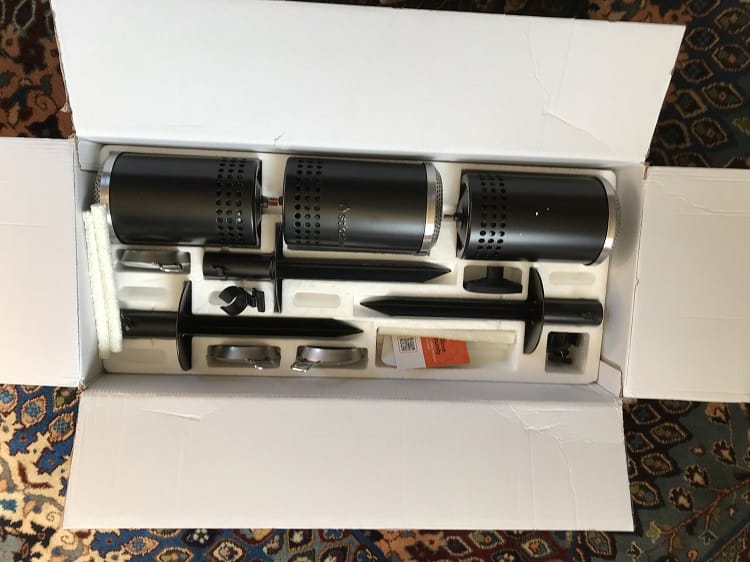
In my box, I received:
- The three torches, to be assembled
- The three ground stakes
- A silicone funnel
- Three detachable snuffers for when you want to put out the flames
- Extra wicks
It did not have any fuel oil as a separate item (though you can buy mixes from Solo Stove), and to the best of my knowledge, Tiki torches need oil.
Tip: I am not particularly eager to spend money unnecessarily and try to live off the land as best I can. I make my own infusions, oils, tinctures, and other herbal remedies, which means I have a lot of extra olive oil and canola oil around the house. I like mixing vegetable oil with a few drops of essential oil to make my own Torch oil. This works well in the summer when the bugs are out because you can add citronella oil drops or lemongrass to the mix to help thwart pesky mosquitoes.
My Experience with the Solo Stove Torch
Getting Things Started…
Shipping took a little bit longer than expected, but when the package arrived on my doorstep, it was in relatively good condition. There were a few scratches and tears along the box’s exterior, compliments of the FedEx driver I think I recently offended.
However, I was beyond pleased with how secure everything was on the inside. The pieces were so secure inside the package that it was almost challenging to get them out of the foam trays in which they were packaged.
It came in a pack of three, so all of the components inside, except for the silicone cup, were in triplicate.
All of the main pieces for the Torch were in the top layer and the ground stakes. Everything was very clearly laid out, so you knew that all the pieces were there and nothing was missing.
Underneath the first layer of Styrofoam were all of the pieces for the main poles.
Setting Up…
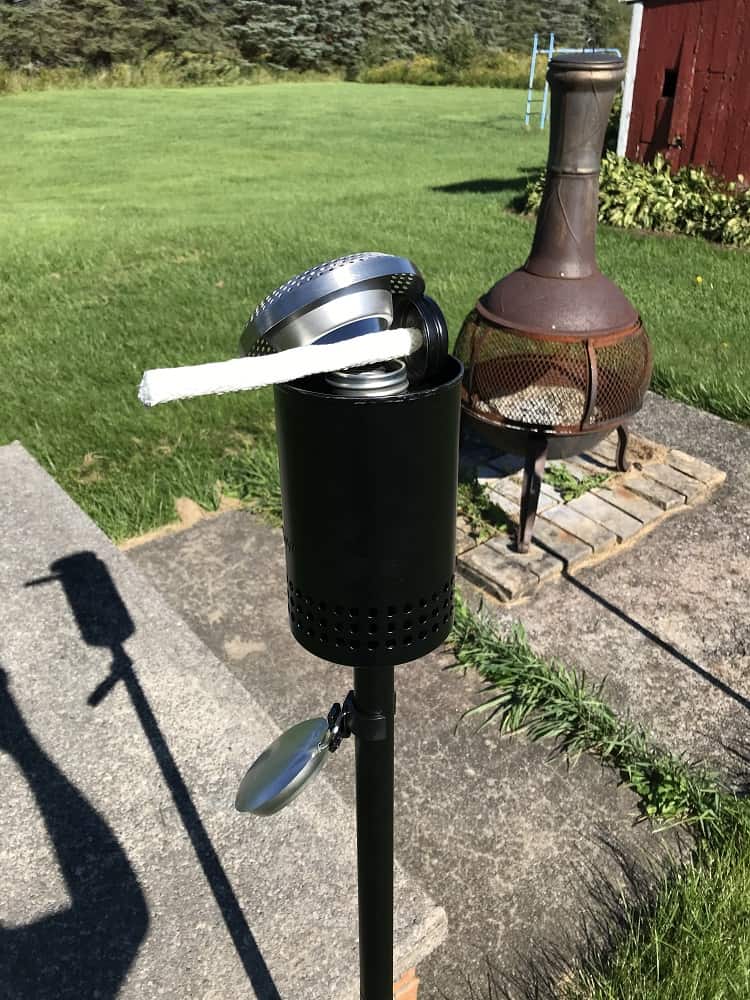
I got a little cocky when I looked at how simple the design was, and I absolutely assembled the main three pieces of the pole the wrong way, meaning I had the bottom pieces where the top piece was meant to go and vice versa. Thankfully, it is a highly durable design, so everything worked out when I switched the poles.
I made this mistake because there were no directions or instructions. I had to rely on the pictures along the outside of the box to make sure everything was the right way.
As my partner will readily point out, I have a problem cross-threading things when screwing stuff into place. I usually cross-thread initially, check myself, and then fix it.
That’s exactly what I did putting this together, and I was very displeased that my initial cross-threading was enough to degrade the black coating over the steel of the main three rods.
After the pieces were in the correct order and everything was secured, I did a quick test where the wing nut secured the bottom part of the stand into the ground stake.
All I did was remove it to check and see if the wing nut had damaged the coating the same way the cross-threading did.
Unfortunately, that’s precisely what happened, and it left a very visible indentation. If I had twisted the wing nut any harder and was not that strong, it could have dented the end. Be a little dainty with this section.
Take backyard torchlight to new heights with Mesa Torch by Solo Stove. With its exceptionally large flame and a super-durable, variable-height frame design, Mesa Torch is made to light the way to the ultimate backyard vibe season after season, year after year.
Heading Outside…
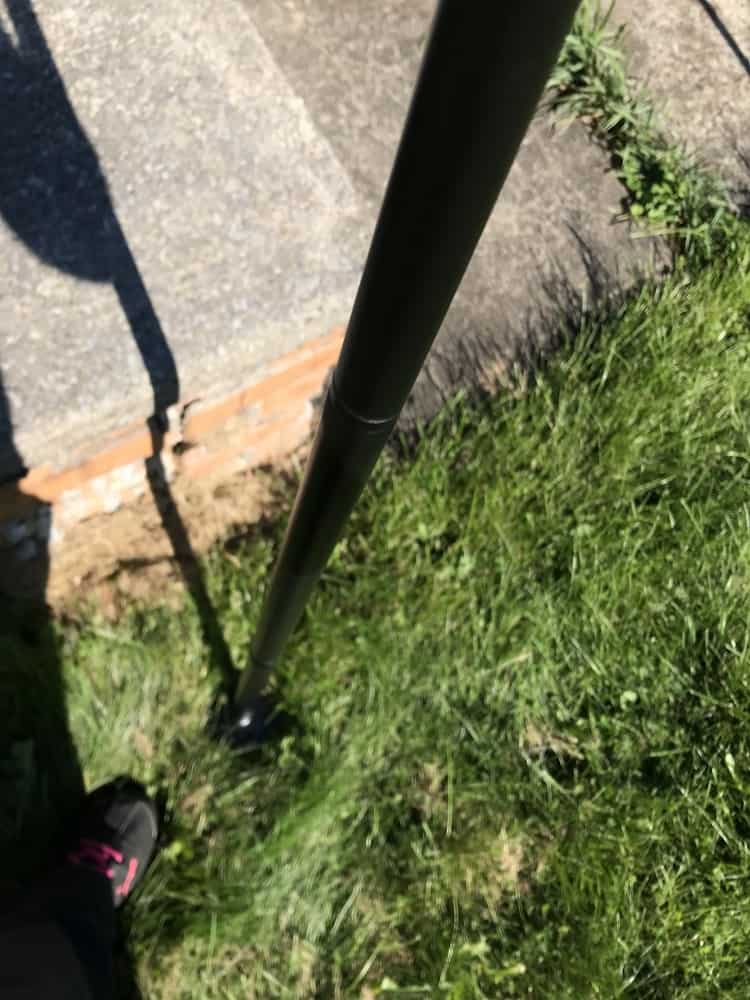
The metal for the central pole of each Torch is nothing to write home about.
Now, there’s a reason for this: Solo Stove is known for designing lightweight and easily transported things. If you were taking these pieces with you on a hiking or camping trip, they break down small enough that one person could easily take one of the Torches without adding a lot of weight.
But if the main poles are made with a stronger or more durable metal, it starts to get very heavy and more challenging to use.
That said, the ground stake is exceptionally high quality. It’s the most durable piece out of the entire setup, and even if you end up not using the rest of the Torch, it was worth it just for that component.
Fill ‘er up…
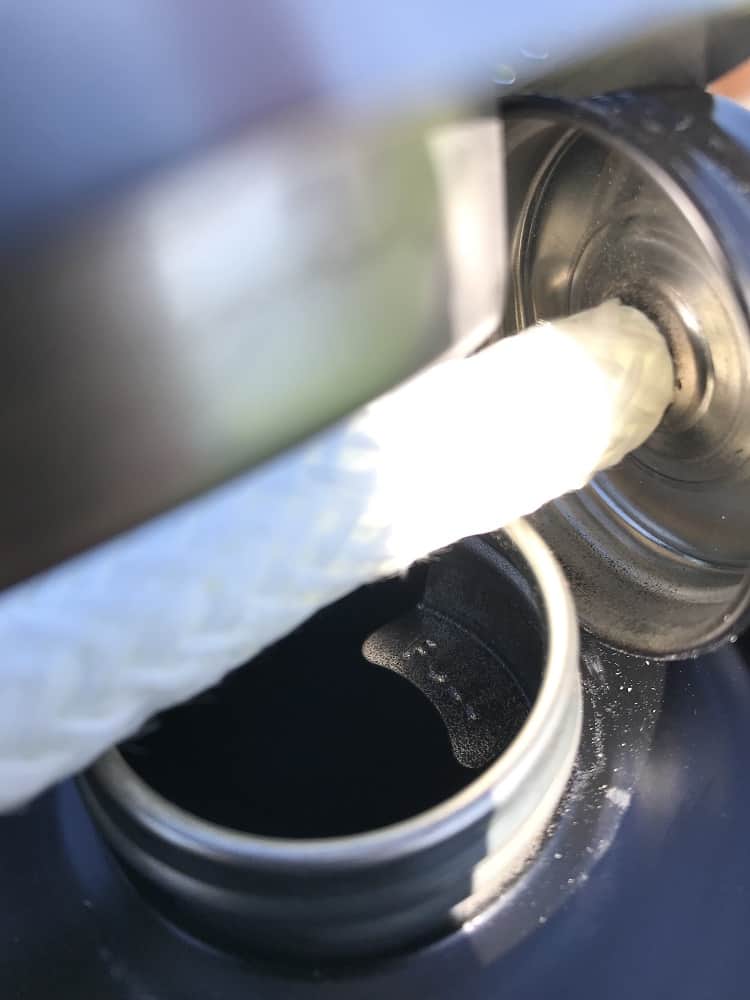
Once fully assembled, each of the Torches is about 4 ½ feet tall. They seemed a lot taller before they went into the ground, and I would advise anyone using them to be careful if they’re mixing alcohol because the flame, at least as far as I stand, is right about hair-height so you don’t want to back into them or trip nearby.
The Solo Stove Torches had permanently affixed internal canisters with a clearly designated mark for the fill line. It looked just the same as when you put oil in your car.
To prep it for lighting, the silver top panel comes off very quickly, and the wick unscrews with a few simple turns.
Note: The product didn’t come with any oil or fluid, although you can buy Solo Stove fluid. I mixed my own using vegetable oil and essential oils to create a nice-smelling environment. I used about 15 drops of essential oil and two cups of vegetable oil to fill the internal canister.
Even though it came with the silicone funnel to fill things up, I honestly forgot to use it because I was so excited to get things going. So I just poured from a regular measuring cup, which worked out really well for the first two Torches but dripped down the internal side of the third Torch.
However, that just meant it dripped down the entire unit, as you can see in my pictures, and was easy to clean up and did not affect how well it burned or functioned at all.
Tip: I let the oil sit for 30 minutes before I lit the wick so that the wick would have time to absorb all of the oil.
Fire in the hole…
I had a bit of trouble getting it lit, not because of anything to do with the design but because it was a very windy day.
However, after making a tiny protective barrier with my hands and successfully lighting the wick, the slight downward angle of the top of the stove kept it protected no matter how gusty things got. I couldn’t believe that even after several hours, I never had to go back and relight it.
A few notes:
- After about two hours, it was still burning just fine, but I used a pair of pliers to pull the wick out a bit more to get a taller flame. It worked perfectly. So if you are looking for a taller flame to light your area, do that in advance.
- The quintessential Solo Stove design worked beautifully. I have no notes. I built a fire in the pit next to these three Torches (so I had light and warmth) and as you can see in the images, the fire (which was burning clean cherry and apple wood) still produced smoke where the Solo Stove Torches did not.
Way go to Solo Stove!
An Evening by the Fire
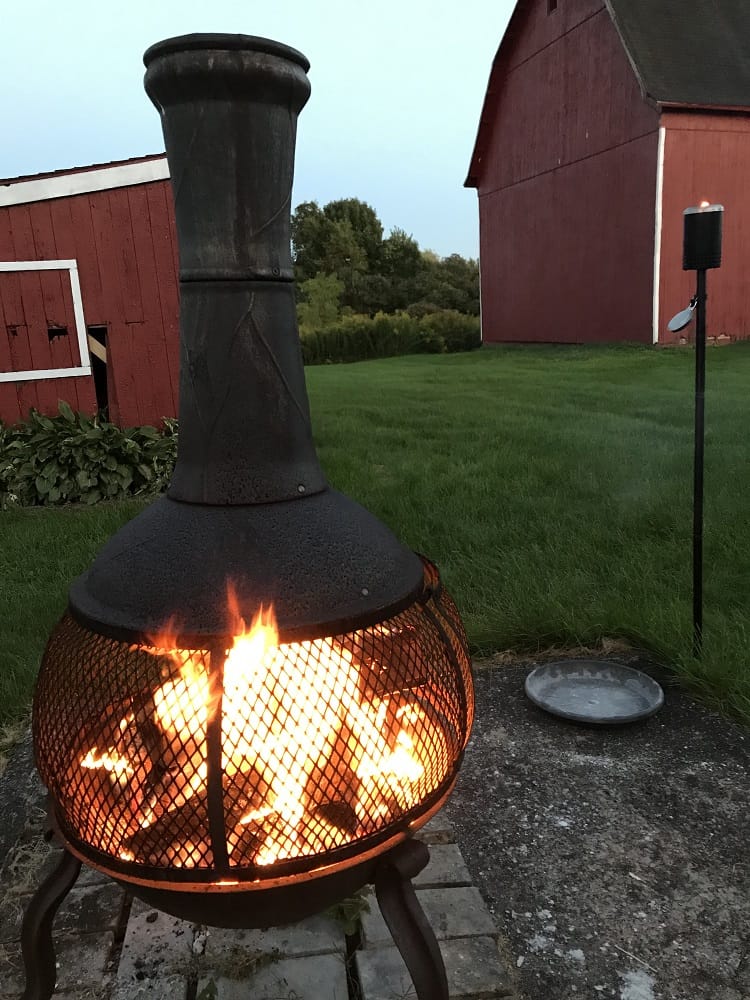
In the end, this worked beautifully.
- Thanks to the unique mixture I made for the oil, I didn’t have to deal with any bugs.
- It paired superbly with the bonfire I had, which is precisely how I would use them camping or hiking.
- They burned for around five hours before it got too cold and dark for me.
- They remained cold to the touch the entire time. No joke, I could grab any part of the Solo Stove Torch, and it was safe.
Pros/Cons of the Solo Stove Torch
Pros
- It was easy to put together (once I put the three stakes together the wrong way and then fixed it, not unlike another adult activity where things are put on the wrong way first, then corrected…).
- The box was very secure, and nothing was damaged in shipping.
- The design is detachable, so you can easily take it apart and assemble it anywhere on your property or take it with you on the go.
- It stays lit once you get things going, regardless of any terrible wind. Good for you, Solo Stove.
- It stays cold to the touch, so it is very safe.
- Putting it out is simple with the removable caps. The fire goes out immediately, and you can even leave the caps on there overnight while it cools.
Cons
- Thank goodness it was easy to assemble because there were no instructions.
- The metal for the stands of the Torch was not the greatest quality; the coating on the outside chipped easily, and the metal was dented by the wingnut that holds it in place.
Alternatives to the Solo Stove Torch
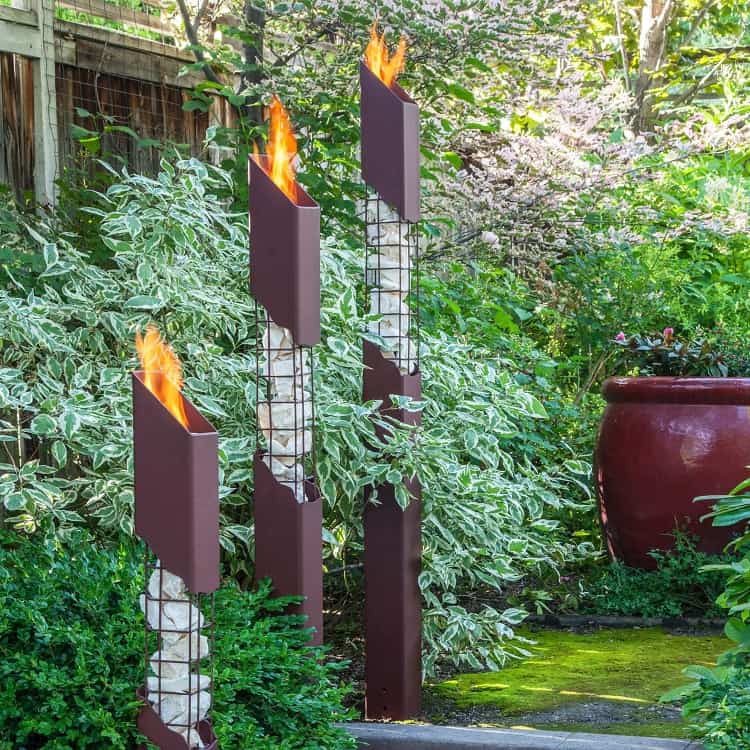
Not everyone is going to be thrilled with the Solo Stove Torch, and I get that. It’s best for people who want something they can take with them camping, hiking, or quickly moving from their house to a neighbor’s house for a cookout or barbecue.
Honestly, there aren’t many competing designs out there. Sure, you can find many generic Tiki torches, but these are not things you can disassemble and easily bring with you on the road or when you’re camping. They also don’t have the same integrated fuel canister and extra large flame pattern design for optimum illumination.
- Garden Torch: This is a standard Tiki torch pack of three. It comes with citronella oil to help keep away bugs. It has the same pieces, like a snuffer, but the snuffer is not detachable like the Solo Stove Torch.
- Mesa Garden: This design is much shorter and intended to give you that pyramid aesthetic where each subsequent tiki torch gets taller and taller. This one is not something you would take apart or pack with you like the Solo Stove Torch, but it certainly has an aesthetic appeal for specific garden designs.
- Rustic Garden: These are patio torches, and they are not meant to be deconstructed and taken on the road, even though they do have the same type of assembly as the Solo Stove Torch. The canisters sit inside a metal frame, so you can just pop them out when you’re done.
FAQs
Question: How Long Does the Fire Last for Each Wick?
Answer: It has a very sturdy and sophisticated design. Getting it into the ground is simple, assembly is equally simple, and the flame lasts for about five hours. Obviously, if it’s really windy, like where I happen to live right now, it doesn’t last as long. But I still love that it lasts about the same amount of time I stay outside as the weather gets colder.
Question: Can I Leave it Outside?
Answer: Don’t leave it outside in the rain or snow. I’ve learned with similar products of the same quality steel that if you leave them outside in the rain for several days, the rain will seep into the joints where the different pieces come together and start to rust from the inside.
Question: How do I Store the Solo Stove Torch?
Answer: This is an excellent option because I can disassemble it, store it in the barn, and bring it out in the winter when I have a big bonfire in the snow or in the summer when I have an outdoor barbecue and want to keep away the bugs. However, as far as storage is concerned, you want to ensure that, as is true of any Solo Stove product, you let it fully cool down before disassemble it. All of the pieces can and should be disassembled if it’s going to rain or snow, and they should be kept somewhere warm and dry. The top canister should be stored upright, especially if you recently had liquid.
Tip: If any liquid hasn’t burned, carefully pour it into a clean mason jar and store it out of direct light and heat. I like to keep mine in simple Bell jars and mark them on top so I can reuse the oil the next time I take out the Torches.
Solo Stove Torch Review: The Final Verdict – 8/10
So, what’s the verdict?
- Assembly: 9/10
- Portability: 8/10
- Construction: 7/10
- Function: 10/10
Honestly, I loved that once I got the hang of it, it was effortless to put together, and it’s very lightweight.
While the metal for the majority of the construction may not be the same quality steel as the stake that goes in the ground, I’m a big fan of how small it is and how lightweight it is because I can put it all in a bag or backpack and then set it up at the lake to help keep away bugs, at a campsite for extra lighting, or just outside my back door when I want to sit with a cocktail in the evening.
Another great thing was how easily the sharpened ground stakes went into the ground. I had no issues setting up and tried several spots around my property.
These were highly durable designs, and if I ever need a ground stake for another purpose, I might just take the Torches apart and use them separately. I was a bit bummed that each time the Torches were assembled, it ruined the coating on the stands; not the best quality there.
Once it was going, there was no stopping it. It was a smoke-free evening (unlike my bonfire) and never got hot or hard to handle.
Overall, I give it an 8/10: Super easy, lightweight, and long-lasting; I would definitely recommend this even if you just want a set of Torches for a few months out of the year.
Take backyard torchlight to new heights with Mesa Torch by Solo Stove. With its exceptionally large flame and a super-durable, variable-height frame design, Mesa Torch is made to light the way to the ultimate backyard vibe season after season, year after year.
Recommended Reads:
• Best Places to Buy the Solo Stove Online


