Anyone who values their tools and machinery knows that proper maintenance and care are a must. At the end of a long summer season, preparing your lawn mower for the cold winter season ahead should be at the top of your priority list. All it takes is one Saturday morning and a quick trip to the home improvement store to have your mower packed up and ready for storage.
Lastly, before diving in, if you have an electric lawn mower, many of these will not apply to you. Instead, the only thing you really need to do to winterize an electric lawn mower is clean it and connect the batteries to a trickle charger. Electric lawn mowers do not have oil, carburetors, gas, air filters, or spark plugs.
Change the Oil
You should be doing this about every year depending on your usage. For most Yardiacs, one year is enough. Start the engine and let it run for about 5 to 10 minutes to let the oil get warm and circulated. Then there’s one of two ways you can extract the old oil.
This only applies to 4-cycle engines, some smaller lawn mowers may only have a 2-cycle engine. If yours is a 2-cycle, the oil is blended with the gasoline.
How to Change the Oil in a Lawn Mower
Most modern mowers have a drain plug on the bottom, which can be removed with a socket wrench. This job will be much easier if you can set your lawn mower up on a workbench or on some sawhorses and 2x4s.
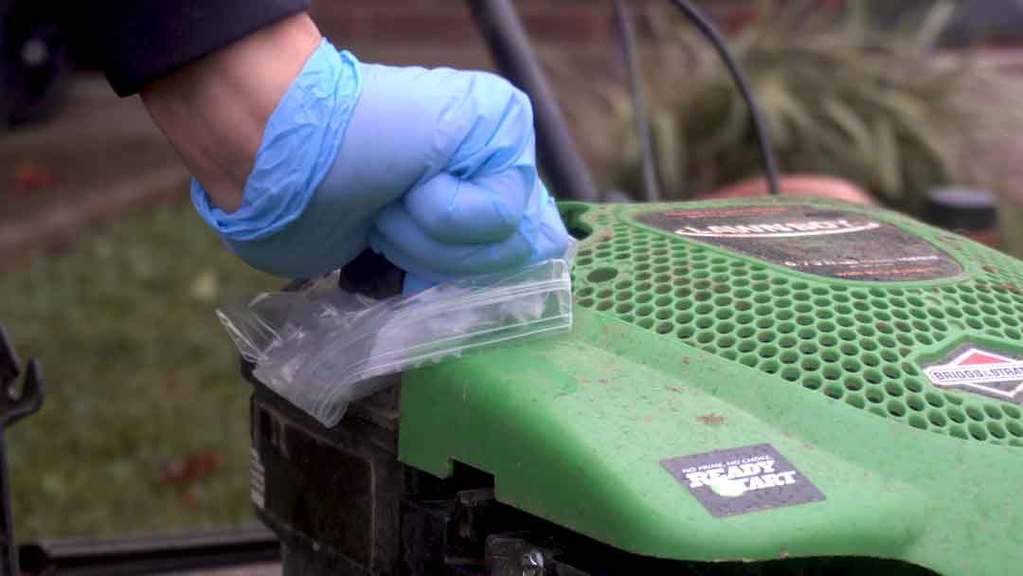
If you don’t have an easy way to prop the mower up, you can drain the oil the same way you put it in. Get an oil pan or something else large enough to capture the old oil. If there’s still gas in the tank, place a plastic bag over the top of it and screw the cap on over it. This will help to create a better seal and prevent gas from spilling.
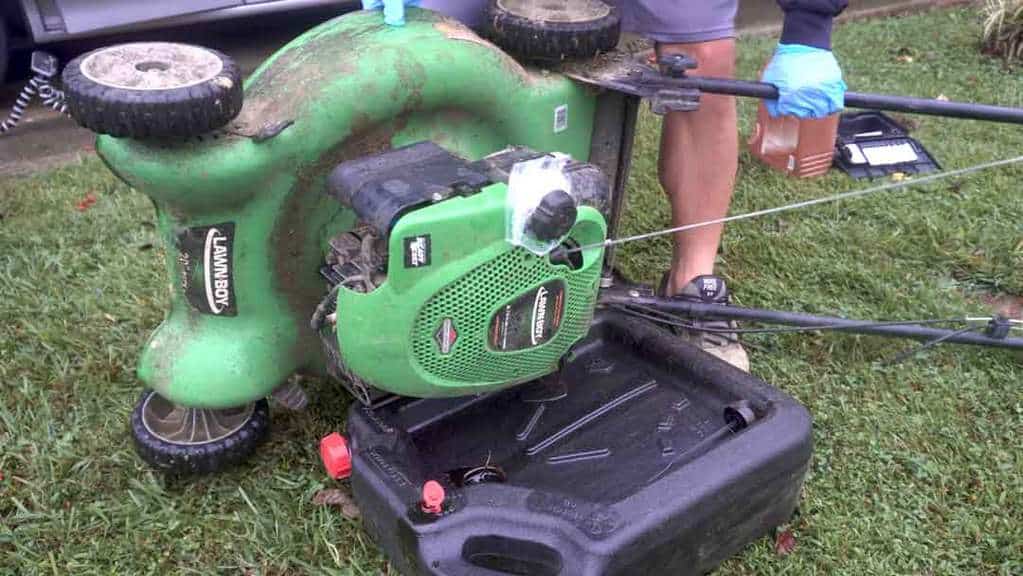
Drain the old oil out the top of where your dipstick goes in by tipping the lawn mower on its side. Check your owner’s manual for how much oil needs to be put back in, typically somewhere in the range of 16oz to 24oz depending on the engine size.
If you don’t have the manual, measure how much you took out. An easy way to do this is to pour the oil from the pan into a Gatorade bottle or some other disposable container where you can estimate the volume.
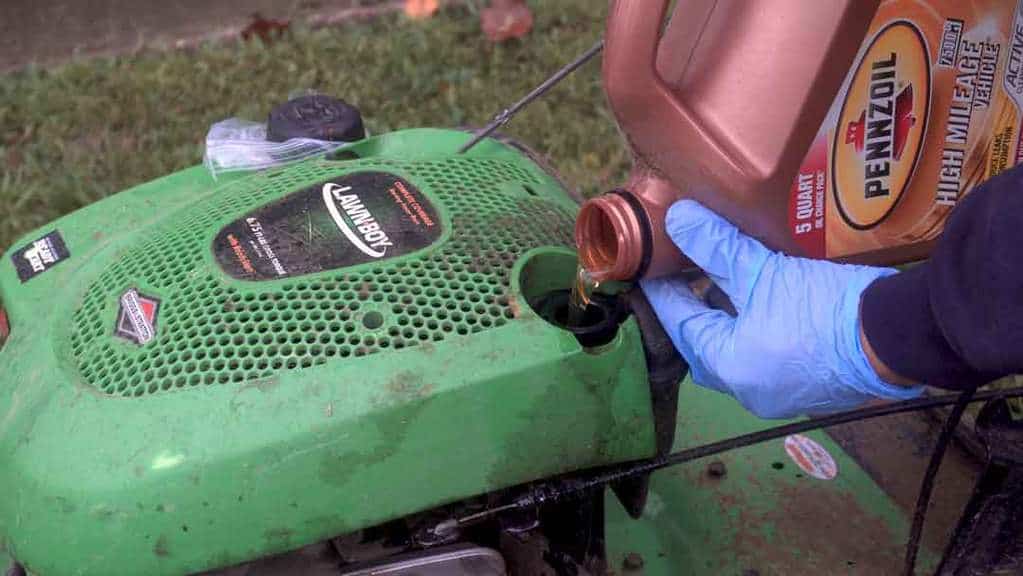
Be sure to purchase the recommended oil for your lawn mower. Yes, you can use automotive oil, just be sure to use the correct weight. Check your manual or call the manufacturer to find a definitive answer. Most of the time you’ll be fine using 10W-30 or 5W-30, which is what most manufacturers put in the mower from the beginning.
If you haven’t changed the oil recently, you may wish to do a flush. This is where you will fill the crankcase with new oil, run it for 10-15 minutes, then drain and refill it for storage. The benefit of doing this is to ensure you get all of the old oil out and remove any other sediments or deposits that may have lingered.
After filling up with fresh oil, run the engine for another 5-10 minutes and ensure there are no leaks anywhere and you’re done!
Clean the Carburetor
This likely only needs to be done every other year, or whenever you notice a drop in performance. A carburetor is a device that allows air to flow into your engine and aid in the mixture that allows the engine to run. Over time, dust, debris, and other gunk can clog the carburetor’s parts and you may notice a drop in performance. It’s usually difficult to tell since the performance drop is gradual.
This process is a little more in-depth so watch the video below for this one (It will automatically start at the carburetor cleaning section). Don’t forget to wear nitrile or latex gloves before using this stuff, it’s toxic.
Fog the Engine
After you have cleaned the carburetor and have the plastic shield off, you may wish to fog the engine. While most 2 or 4-stroke engines don’t have a problem with rust forming inside the cylinders, it never hurts to add a protective layer during the colder months.
How to Fog a Lawn Mower Engine
Fogging the engine is essentially spraying the internal parts with a specially designed waxy-oil coating that helps to prevent water from creeping in and causing problems. All you need to do is spray directly into the carburetor several times and kill the engine. Then remove the spark plug and spray it in there a few times.
This will be enough to coat the inner cylinders and other critical engine parts. Initially, your mower is a little more difficult to start in the spring, but this is normal with fogging oil.
Check the Rubber Tubing
While you’re cleaning the carburetor you will have had to unhook some rubber tubes connecting the gas tank to the carburetor. Check these tubes to ensure there’s no dry rotting and the connections are firm and not leaking. If any show signs of dry rotting, cracking, or other damages are sure to replace them. Replacement tubing can be picked up from an automotive store for a few dollars or less.
Take the old tubing with you or take measurements before you go so you can get the same size. You may also need to purchase new hose clamps if the original ones are not holding as firmly as they should.
Clean or Replace the Air Filter
If you went through and cleaned the carburetor you had to remove the air filter and you may have noticed it was dirty. If you have a reusable air filter clean it according to the directions included with the filter, otherwise, you will want to purchase a new paper one. Air filters are usually around $10 and can be installed in a few minutes.
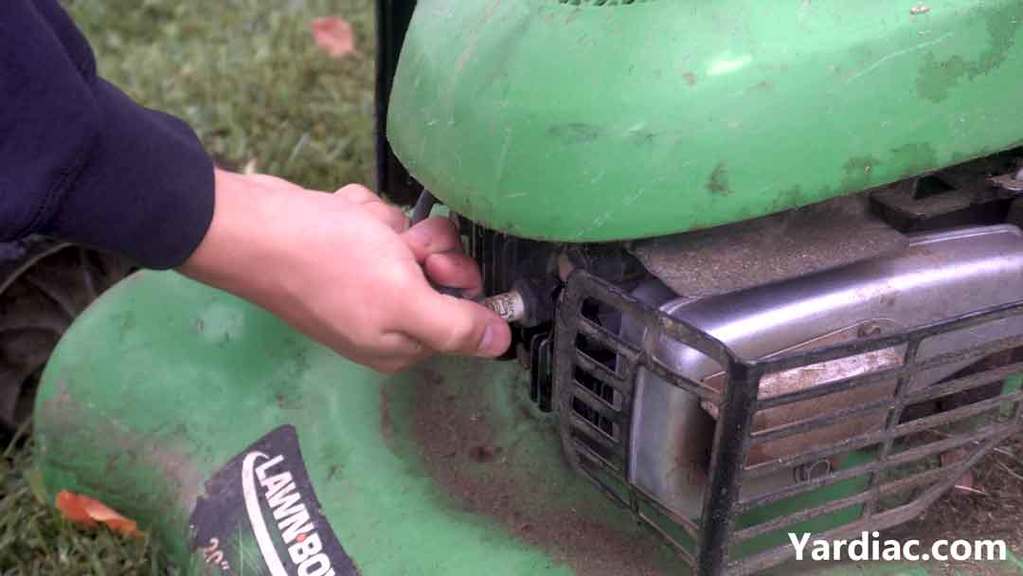
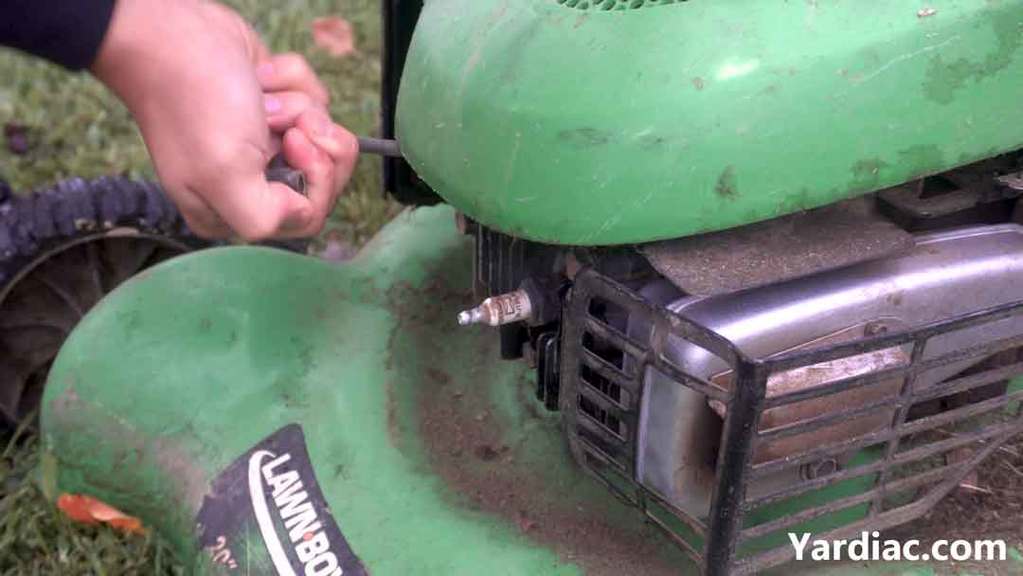
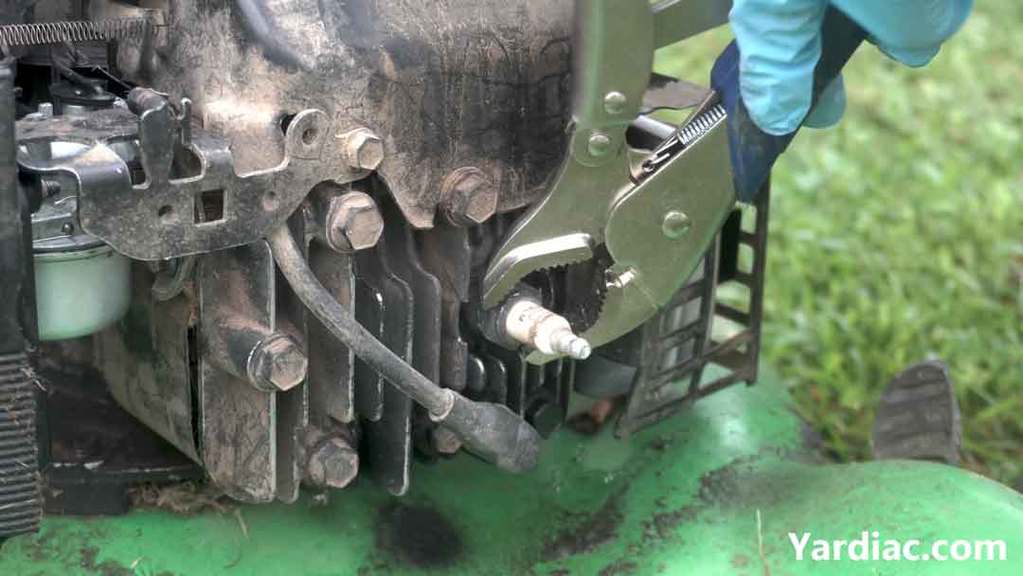
Remove the Spark Plugs
Start by unhooking your spark plug’s connection from the motor. Using a deep socket wrench, remove the spark plug from the mower and check for signs of corrosion.
Spark plugs are on the list of things to replace ‘as needed’. However, if you want to avoid the headache of the mower not starting, add a spark plug to the shopping list for your trip to the home improvement store. While you may not need to install it right away, having it on hand will save you time later. Most spark plugs will end up costing $3-$7, so it’s an inexpensive add-on.

Sharpen the Blade
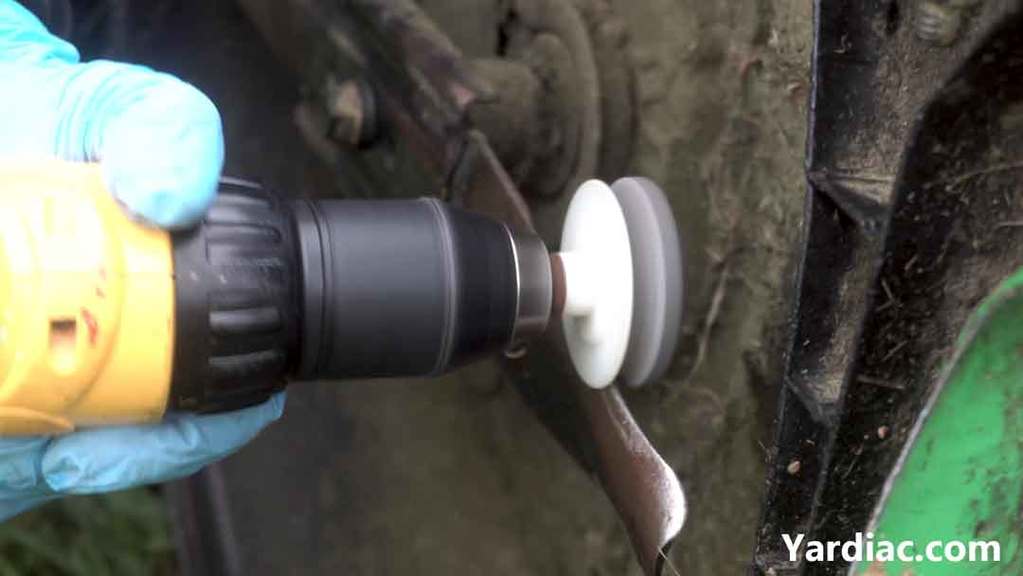
Blades can become dull after many hours of cutting grass and hitting debris like sticks and rocks. A dull blade means more stress on the engine.
Sharpening the blades will help to improve cutting efficiency and require less work from you and the engine. You can take your blade to a professional to get sharpened, or you can purchase a drill attachment that will work at a fraction of the cost. These attachments cost less than $8 and will last for years to come.
Battery Maintenance
If your mower has any sort of battery component you will want to take care of those before storing them for the winter. Any small components such as a key or electrical starter, simply remove the battery. For riding lawn mowers or larger motors that use a 12V battery source, you will want to completely charge those before placing them in storage.
You can use a trickle charger to charge it after removing it and keep it charged all winter long. Batteries lose energy each day and if not kept charged, may end up dying, causing you to have to purchase a new one in the spring.
A trickle charger can be left hooked up to the battery all winter long and can monitor the battery’s levels and only charge when needed. This is called a floating charge and helps keep batteries in optimal health.
Batteries that fall below a certain threshold can become damaged. Instead, they should only use a certain percentage, rather than the battery’s full charge. This is called depth of discharge and if they fall too far below their recommended DoD, their lifespan can be significantly shortened. Over many months of sitting dormant, a battery can gradually lose its charge – this is why having a trickle charger is a must for 6V, 12V, or 24V batteries.
Fill the Gas Tank
Many other online sources suggest draining the tank completely, however, there is a caveat with this. Draining the tank allows for air to remain inside the gas tank which can cause condensation to form. Water isn’t good for the tank or engine and causes corrosion.
Instead, it’s recommended to fill the gas tank with a gas stabilizer, which can be bought just about anywhere, and then top the tank off with fuel. This will keep the gas fresh and prevent any condensation from forming. You may have a harder time starting it in the spring, but once the stabilizing fluid runs through the system, it will help to protect and lubricate the engine’s parts.
General Cleaning
Last but not least, do some general cleaning on the entire motor. Scrape away any grass and mud that has caked up on the bottom of the undercarriage and use a wire brush if needed. Using some warm soapy water, clean the complete exterior of the deck. Use some compressed or canned air to blow away the dust in any hard-to-reach places.
Tighten any nuts or bolts around the handles or other connecting points that may have vibrated loose. Finally using an old rag or shop towel, lightly dab some new oil and spread it around the freshly sharpened blade and undercarriage to prevent rust or corrosion from forming on the bare metal.
Summary
And that’s it! You’re done! If you plan on doing everything in this article, here is your shopping list for the home improvement store or purchasing from an online retailer like Amazon.
- Manufacturer-recommended oil or 10W-30
- Oil funnel
- Carburetor cleaner
- Air filter
- Fogging Oil
- Spark plug
- Fuel stabilizer
- Wire brush or scraping tool (optional)
- Rubber tubing (if needed)
- Blade sharpener (if needed)
- Battery trickle charger (if needed)