
Food waste has become a global epidemic, and we’re not even exaggerating. When you toss a half-eaten apple into the trash, you’re not only wasting what’s left – you’re wasting time, resources, and money just to get the fruit from the orchard to your hands.
For an exponential problem such as this, there have been a lot of proposed solutions that are quite elementary and slow-going, but full of promise and results.
Enter: the zero-waste movement, or the philosophy which encourages people to decrease their impact on the environment by promoting responsible production and consumption instead of embracing consumerism and instant purchases. That also includes our biodegradable waste products, which we constantly produce.
Since the zero-waste movement is starting to make waves lately, you may have heard about the Bokashi method, which is a Japanese term for the “fermentation of organic matter.” It’s a unique and inexpensive solution that addresses a lot of issues in food waste and organic refuse disposal that usually comes from the things we buy, cook and eat daily. The best part is that it’s a lot more simple than you think!
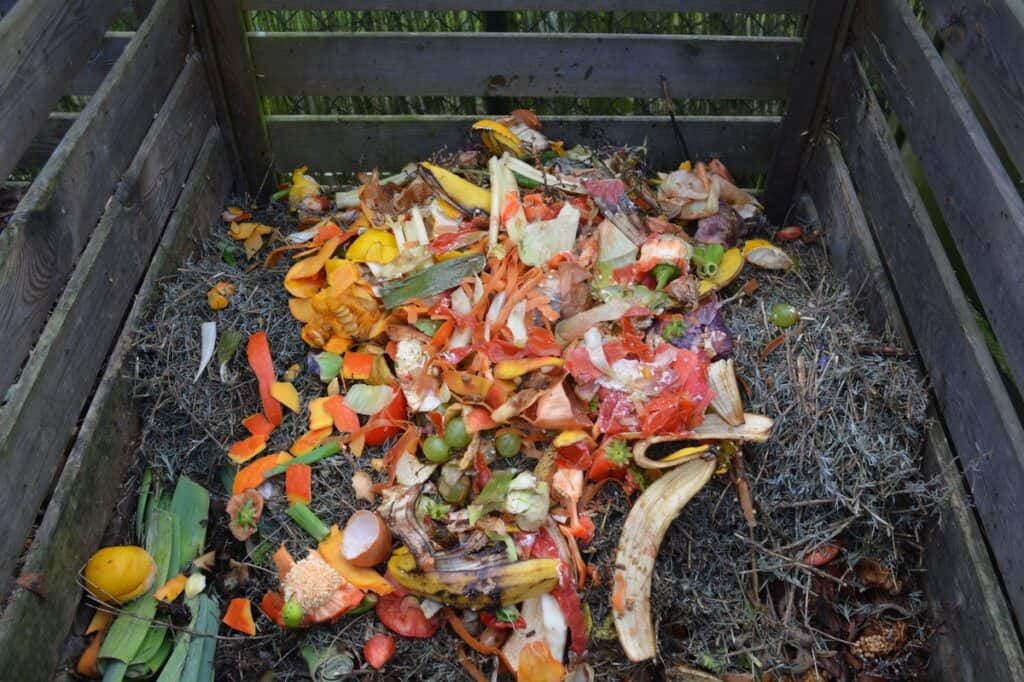
Unlike traditional composting which promotes decaying, Bokashi involves fermenting or ‘pickling’ organic scraps of every kind with a special starter sawdust mixture – think of a random mix such as fruit and vegetable peels, coffee grounds, or even month-old Chinese takeout that you’ve forgotten about (sans the plastic-lined container).
With this simple method, you can create a ‘compost tea’, which is a brew of nutrients and goodies that your plants will surely love. We’ll show you how!
From Bokashi Zero to Bokashi Hero: Getting Started
If you’re new to the whole process of composting and the Bokashi method, no worries – it’s really easy! Just prepare the following materials:
- Two bins of different sizes (ideally 5 gallons / 20 liters), with the smaller-sized one sliding easily into the bigger container.
- The smaller bin must have some drainage holes, similar to a watering can.
- The bigger bin must have a faucet attached to the bottom, where you can extract your bokashi tea.
- Both of them must have secure, air-tight lids which can be removed easily.
- Old kitchen tools which you may already have available, such as spatulas, basters and potato mashers. These things will help you with manipulating your Bokashi scraps easily.
- Inoculated Bokashi bran, an activator that’s chock-full of beneficial and effective microorganisms (EM). This is the most important component of the whole system. You can either purchase a ready-made mix or make your very own, which could save you a lot of money.
- A plate that will protect the whole system from the air, especially when you fill it up daily.
- Gardening gloves and a mask (as needed).
If you’re looking for a more convenient and hassle-free option, there are starter packs available on the market which include both the Bokashi bran and the spouted bin.
This is useful since the compost tea or leachate is drained from time to time, and emptying bins manually seems too messy and time-consuming. But do know that building this kind of system from scratch is quite easy and manageable, so it’s always best to reuse whatever you have and only make new additions if you don’t own them yet.
Steps on How to Create Your Own Bokashi Magic
First, you’d want to gather all of your materials and make sure that they are ready for use. Place some spoonfuls of Bokashi bran on the bottom of the inner bin. Especially if your system doesn’t have reliable drainage, you can alternate this step with shredded newspapers and then some bran.
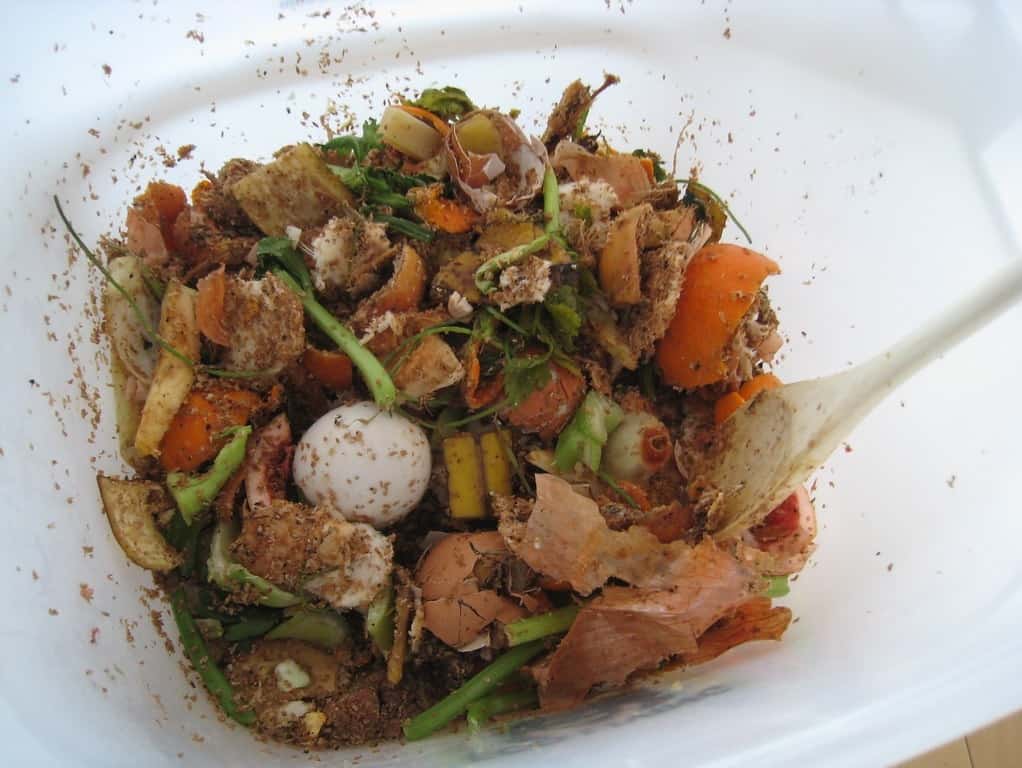
Cut your scraps into manageable pieces and add your first layer, minding the air pockets and compressing as you go. You can add almost every kind of organic refuse such as dairy, fish, eggs, eggshells, meat with little to no bones, etc.
Put an adequate amount of bran (that’s just enough to cover all the areas) onto the top layer and press it down with a spatula or plate. If you’re using a plate for this, you can leave it on top to prevent air from entering the system.
Repeat this process daily until your bucket is full. Keep it undisturbed for a week or two, and continue to drain excess liquid every other day. The liquid, or compost tea, can be mixed with a 1 Bokashi liquid: 100 water dilution as a nutrient powerhouse for your plants. You can also pour the liquid down the sink or toilet, which could improve clogs and drains.
Note that once the fermentation process is over, you can dig a pit or trench about 20-30 cm deep, where you can pour the contents of a matured Bokashi system and cover with soil. After 2-4 weeks, the pit will have a decreased level of acidity. By that time, you can plant into the Bokashi-enriched soil.
Before Anything Else…
Of course, there are a few things that you must keep in mind before you start with Bokashi composting:
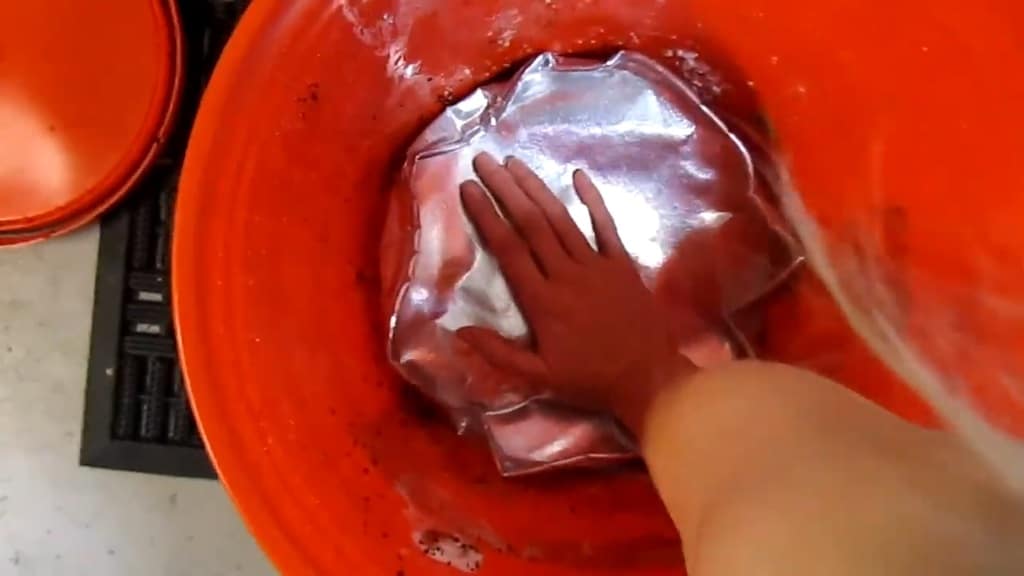
- The groundwork of Bokashi stems from anaerobic processes. You have to keep the system as free from oxygen as possible. Always keep a plate, spatula, or masher which could effectively compress accumulated wastes daily. This will eliminate air pockets and mixing previous wastes with the present ones.
- Sprinkle your refuse with an adequate amount of Bokashi bran, enough to cover every area. This would prevent pungent smells from your bin, as opposed to the healthy, sauerkraut-like smell of a normal system.
- Remember to extract liquid from the spout regularly. This would help maintain suitable conditions inside the bin. You can only use the liquid within a day or so.
- Don’t add vast amounts of deep fryer fat or used cooking oils. The system is meant to keep up with a certain amount of fats from fried food, dressings, and cheeses, but please don’t dump your fryer refuse into the bin.
- Don’t put moldy, mildewy leftovers into the bin. An exception to this rule is for food with white mold.
The Science Behind Bokashi
As mentioned earlier, bokashi is a process that requires the fermentation of food and vegetable scraps. If you can recall your high school science class, fermentation is an anaerobic process, meaning it happens in the absence of oxygen.
It’s important to note that, unlike traditional composting methods, bokashi is not a method that breaks down the scraps by decomposition. Rather it relies on bacteria, specifically Lactobacilli, to begin the fermentation process.
The organic material, whether it is bran, rice, wheat mill run, or even sawdust, has been inoculated with the Lactobacilli bacteria. This simply means the bacteria has been inserted into the grain and is ready for use in your bin.
Whenever you see a bokashi kit or bran touting ‘effective microorganisms’ or ‘EM,’ the lactobacilli is what they are referring to.
Step 1
Introducing the inoculated bran to your bokashi bin allows the Lactobacilli to begin converting a portion of the carbohydrates that remain in the food scraps to lactic acid. The process is referred to as homolactic fermentation, meaning it only produces lactic acid as a result of the fermentation process. One molecule of glucose is turned into two molecules of lactic acid.
The lid is then sealed on the container, ensuring it is airtight and left in a room temperature area for the next two to three weeks. The amount of time will vary based on how much organic matter is in the container and how much bran is used.
Step 2
While the bin remains shut, leachate, more commonly known as bokashi tea, is drained off and used for various soil enrichment purposes. Only bins with a special spigot attached can drain off leachate without introducing oxygen to the process.
The bokashi will not produce heat and, in fact, will actually absorb a small amount of heat as it is an endothermic reaction. This means it absorbs heat while the bacteria is breaking down the organic material. Homolactic fermentation releases no carbon dioxide, methane, or any other gas. Because of this and the absorption of heat, it is generally safe to perform indoors.
Step 3
After fermenting for the appropriate length of time, the mixture is opened up and mixed in, or buried, with regular soil. By now, the mixture is already ‘pre-broken-down’ when introduced to the soil. Exposing the mix to air oxidizes the lactic acid that has formed and turns it into pyruvate. Glycolysis is the metabolism of glucose. One molecule of glucose is broken down into two molecules of pyruvate.
Recall glucose is a form of carbohydrate. When lactic acid is oxidized it is simply turned into something simpler plant life can absorb.
Step 4
The pyruvate is easily consumed by the soil and life around it. This enrichment helps to deliver more useful nutrients the plants and ground can absorb and is sometimes supplementary to vermicomposting.
Bokashi Tea vs. Compost Tea
Bokashi tea is not the same as compost tea. Both may be referred to as leachate, which is simply the runoff from any heap of organic material. Generally, the biggest difference between bokashi and compost leachate is its acidity. Bokashi leachate is typically much more acidic than compost leachate and may need to be diluted before use.
How to Use Bokashi Leachate
For Fruits, Vegetables, Flowers, etc
If you plan on watering fruits, vegetables, flowers, etc. with bokashi leachate, you will want to use it shortly after extracting it from the bin. Do not let it sit for more than an hour or two or it’ll begin to stink! After draining it from your bin, you’ll want to dilute it to a ratio of around 1:100 and then water the desired area.
The 1:100 ratio is just a starting point. You may want to adjust it according to what your plants or lawn can tolerate. Half a cup of leachate in a 3-gallon sprayer will usually work fine.
Most gardeners prefer a garden pump sprayer, as it’s easier to dilute the leachate in it and effectively cover a large area. The leachate is typically used to enrich areas that would be difficult to supplement with pre-compost. Some areas to consider may be large lawn areas or areas with heavy vegetation.
You can use regular tap water or if you collect rainwater, rain from your rain barrel. Rainwater is preferred because some water systems are chlorinated, which can reduce the effectiveness of the leachate. This is due to the chlorine killing off the good bacteria.
As an Organic Weed Killer
On the flip side, the acidity makes bokashi leachate an excellent weed killer. When left undiluted, it can be poured directly onto weeds and the area surrounding the weeds to kill them and leave fertile soil. Keep in mind this will work with shallow-rooted weeds, like crabgrass and chickweed. This is a non-selective method, so be careful you do not pour any on any grass or plants you want to keep.
As a Compost Enricher
If you have a compost bin, you can add the leachate directly to the bin or pile, undiluted. This will add healthy microbes to your compost and speed up the decomposition process.
As a Drain Cleaner
As already mentioned, you will need to regularly drain the leachate from your bin. If you don’t make compost and don’t have the time to pour the tea elsewhere, you can pour it straight down the drain. The microbes help to clear drains from organic matter and keep your pipes clear. It’s safe for plumbing and doesn’t pollute.
If your home has older copper pipes, you will want to dilute the leachate before pouring it down the drain. The high acidity can damage the copper.
How to DIY a Bokashi Bin System
Getting started with a Bokashi bin system isn’t difficult or expensive. Below is a list of items to purchase to get started. This ‘How-To’ was written with the bare essentials in mind. A few items included are listed as optional, but are highly recommended to purchase as they’ll make the process a lot easier.
Materials
- 2x 5 Gallon Buckets
- 1x Air Tight Lid
- Bokashi Bran
- Drain Spigot (optional)
- Plumbers tape (optional)
- 2x Flexible Washers (optional)
Tools
- Drill
- 3/16” Drill Bit
- Drill bit large enough for drain spigot (optional)
- Or hole saw
Start by drilling 15 to 25 holes in the bottom of one bucket, spacing the holes evenly apart. These holes will allow the leachate to drain from the rest of the material.
Next, if desired, drill a hole just large enough for the drain spigot into the side of the second bucket. Place this hole just an inch or so from the bottom of the bucket. Remember, the spigot will hang lower than the bottom of the bucket. If you plan on placing this bucket on the ground at any point, then the spigot will not allow it to sit even.
Wrap the threads of the spigot with plumbers’ tape. Insert a flexible washer on the threads of the spigot and insert the spigot through the hole. On the inner side of the bucket, add the other flexible washer to the spigot. Screw on the nut and ensure the fit is snug and tight.
Go ahead and fill the bucket with the spigot with water. Ensure there are no leaks and the spigot is working properly. If there are leaks around it, use something like a flex-seal or caulk to fill the gaps around the spigot. Allow the flex-seal or caulk to dry for 24 hours before testing again.
Now, you can insert the bucket with holes on the bottom into the top of the bucket with the spigot. Place your food scraps in the top bucket, add your inoculated bran, and then cover with the lid. While it’s not perfect, this DIY bokashi bin will work and allow you to drain the leachate off as needed. As the scraps ferment, the drainage will seep through the holes and collect in the bottom bin.
All you will need to do is tilt the bin and drain off the leachate every couple of days. If you opt to not use the spigot, you will have to lift up the bucket containing the scraps and then drain the leachate into another container for use.
Commercial and Large Scale Bokashi Making
If you own a restaurant, run a commercial kitchen, or simply have a large family, composting bokashi on a large scale is a little different than the 5-gallon buckets most homeowners use.
Commercial bokashi has many different requirements, mainly due to the large volume of organic matter that has to be dealt with. Tasks such as moving the compost and draining off excess leachate become much more difficult when dealing with hundreds or thousands of pounds.
At some point, heavy machinery must be used from a practical and safety standpoint. Then the question becomes, at what point do you become greater than carbon neutral? Effectively, when does it not make sense to compost, via bokashi or other methods, on a commercial scale?
There you have it! The Bokashi method is an all-important facet of environmental sustainability and waste reduction, which are important when it comes to combating global warming and climate change. Baby steps as they say, but the repercussions of our consistent actions are powerful enough to create the change we want to see. Go green, and be a Bokashi hero now!

